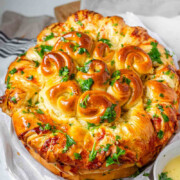
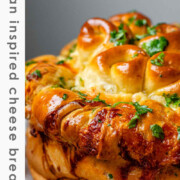
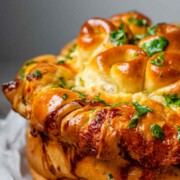


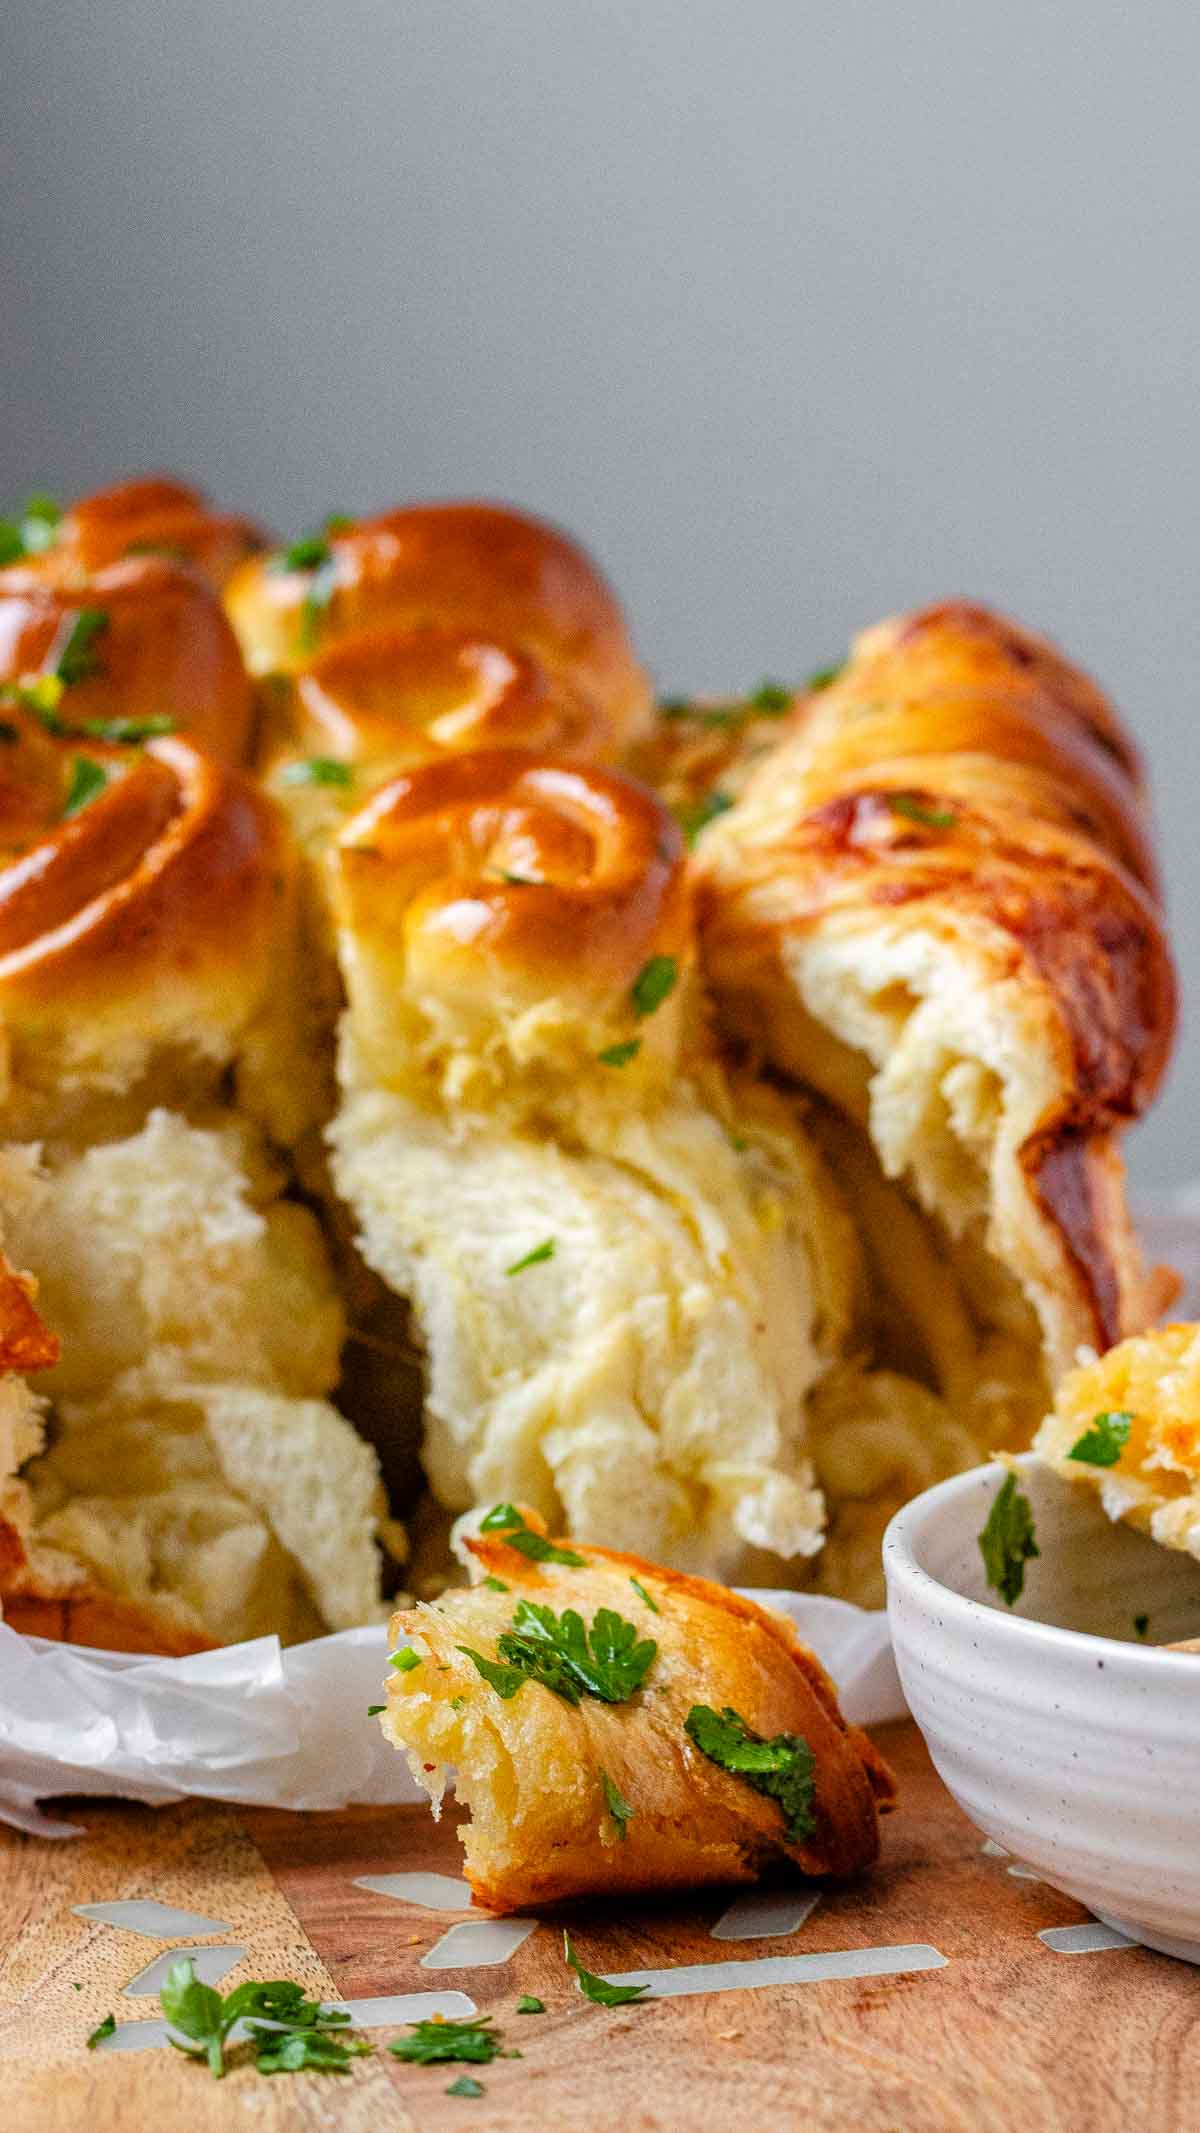
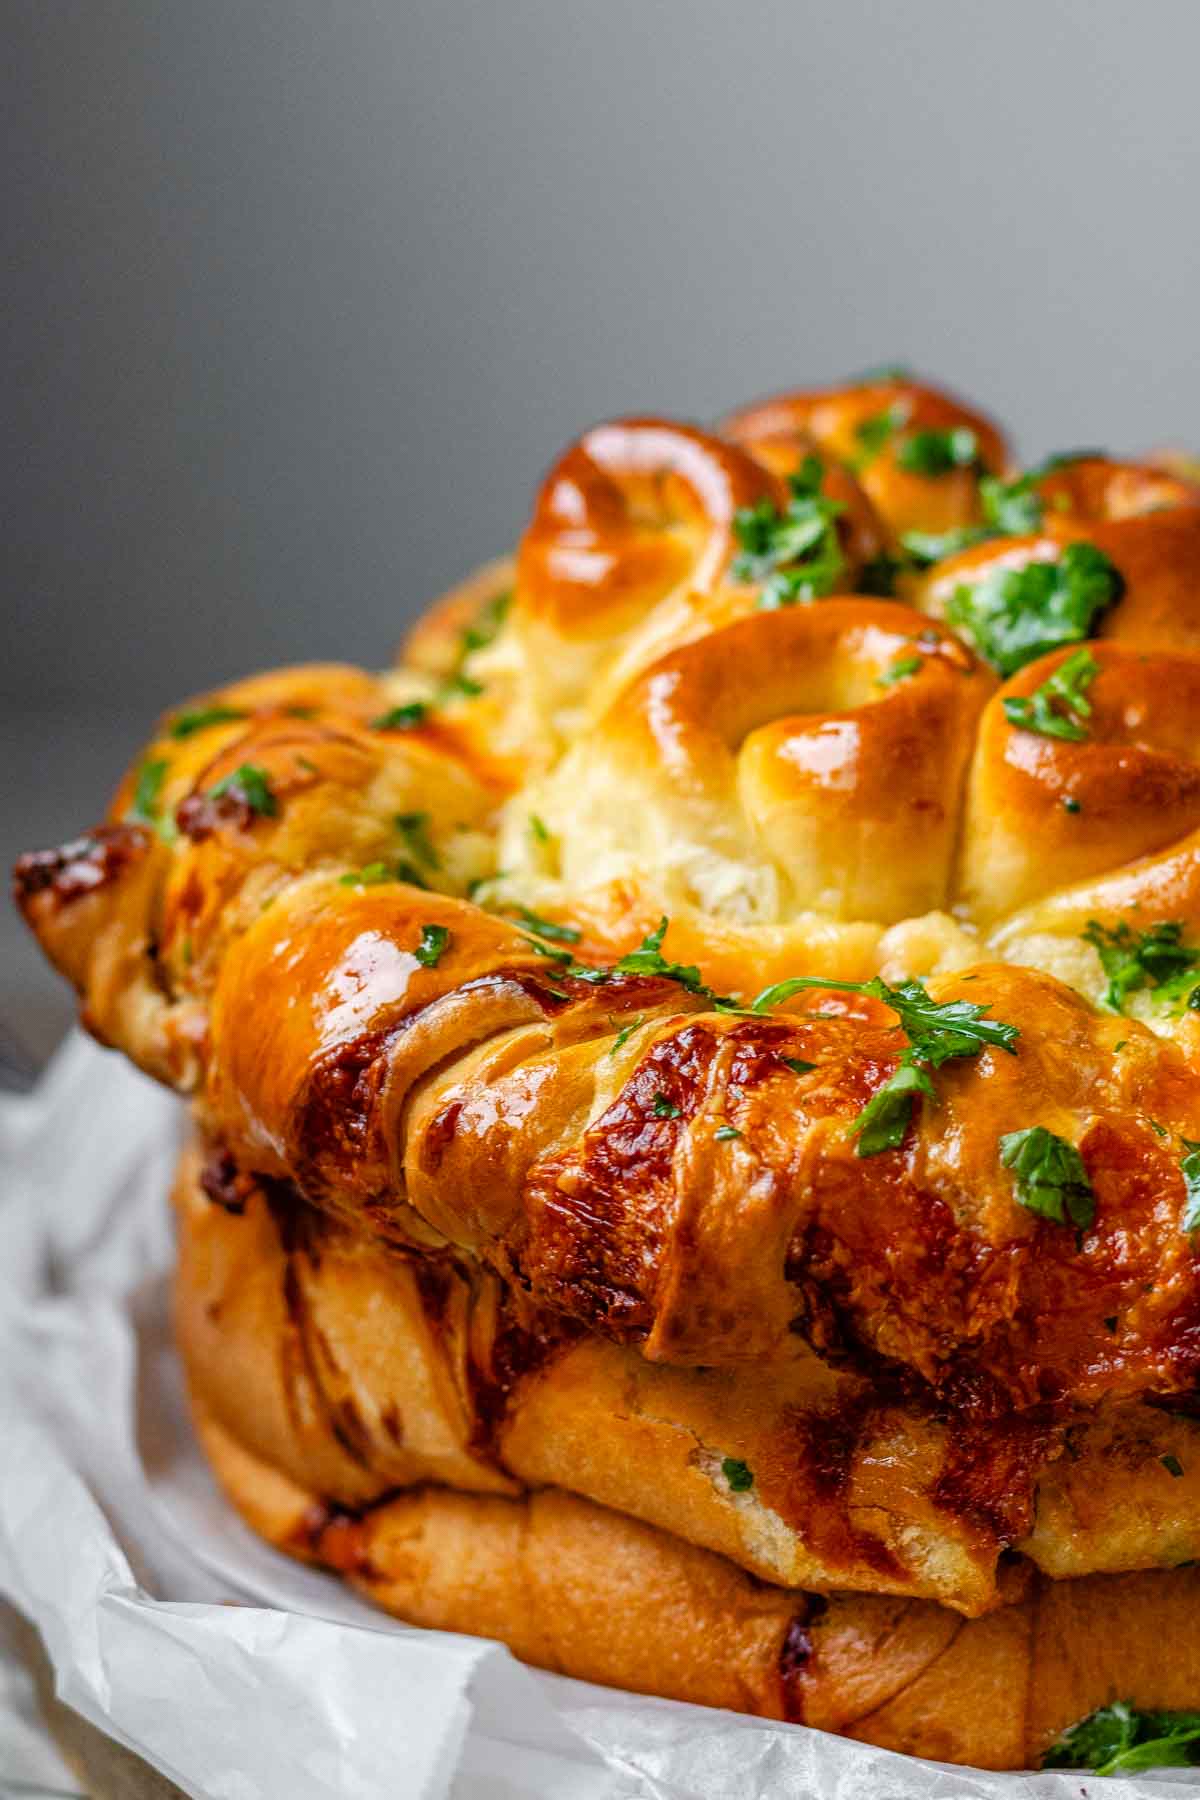
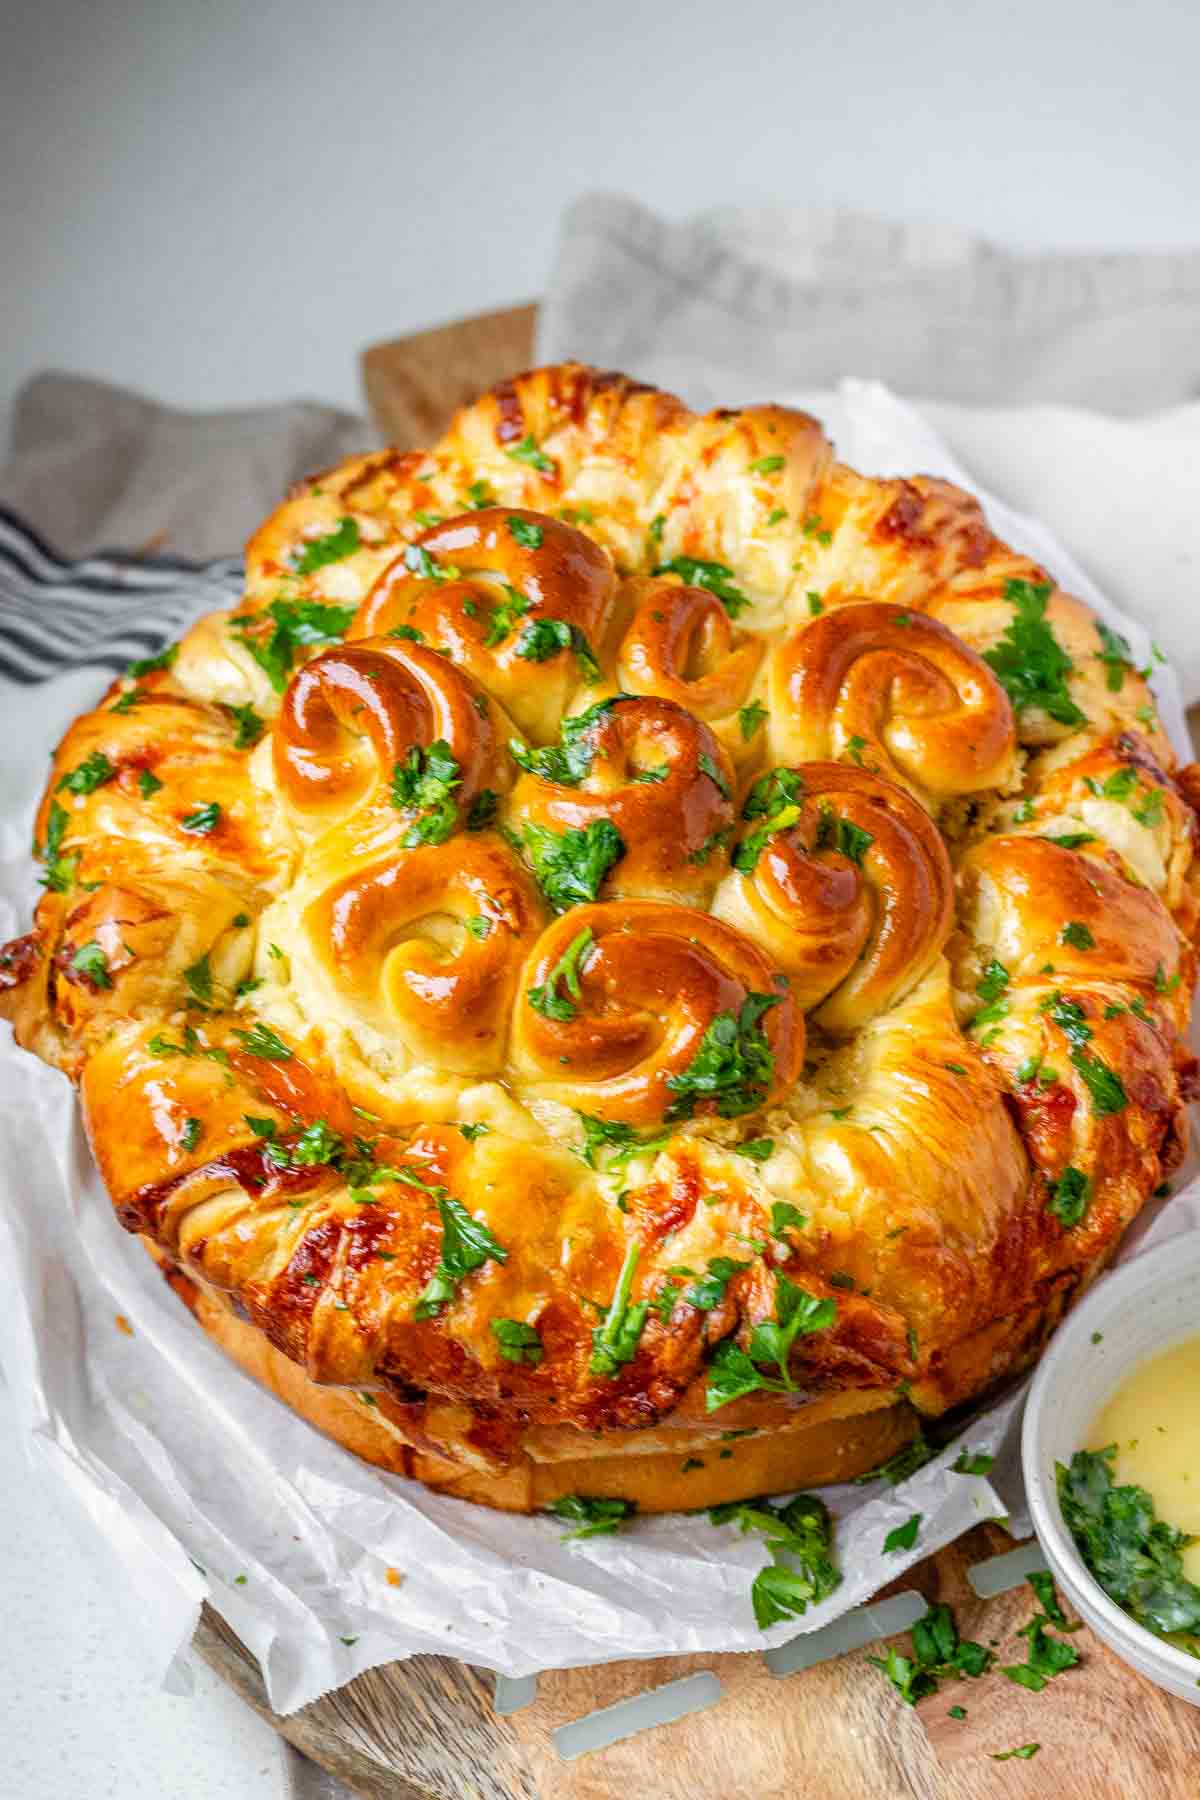
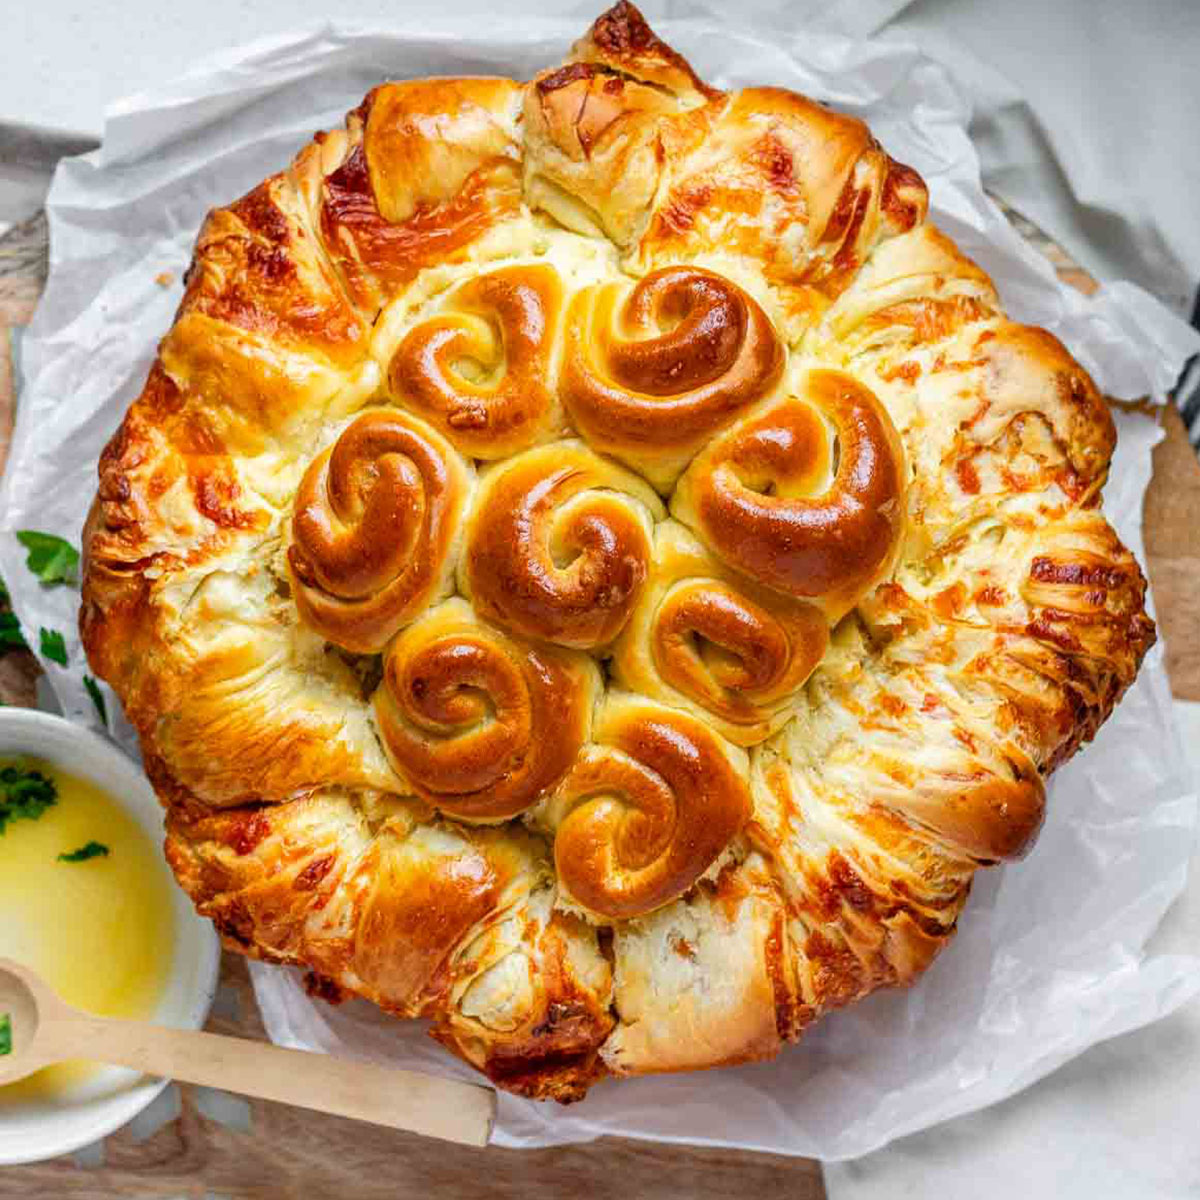
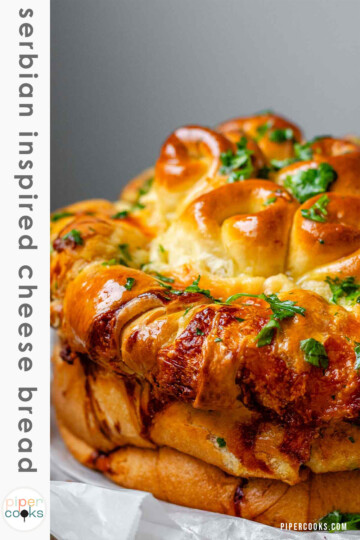
This soft, pull-apart garlic cheese bread is inspired by traditional Serbian butter bread, a beautiful bread known for its buttery layers and decorative shaping. My version keeps the spirit of that bread but with a garlicy, cheese-stuffed twist. The dough is layered, rolled, cut, and then baked in a springform pan to serve family style. The pieces pull apart easily at the table!

This recipe is my garlicy and cheesy take on a Serbian bread recipe that I came across recently while learning about bread from around the world. This bread is a buttery layered bread that looks impressive but is surprisingly doable at home.
The dough is soft and enriched with eggs and milk, and the filling combines garlic and two cheeses for a rich, savoury pull-apart loaf that works alongside your weeknight pasta or a fancier holiday dinner.
You’ll learn how to roll and cut the dough to create this impressive decorative bread. Read the detailed step-by-step instructions below, complete with photos of each step, to help make this bread easy to shape!
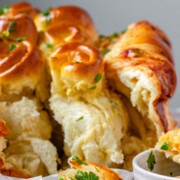
Serve the loaf family style, in the middle of the table, and everyone gets to pull off their own piece.
Ingredients
See the recipe card for exact amounts. Read tips below about some of the recipe ingredients.
- Active dry yeast: Helps the dough rise and gives the bread its soft texture. Make sure it bubbles before moving ahead. If you use instant yeast, you can skip the step of proofing the yeast.
- Warm milk: To activate the yeast. Aim for 110°F to 115°F so you don’t kill the yeast.
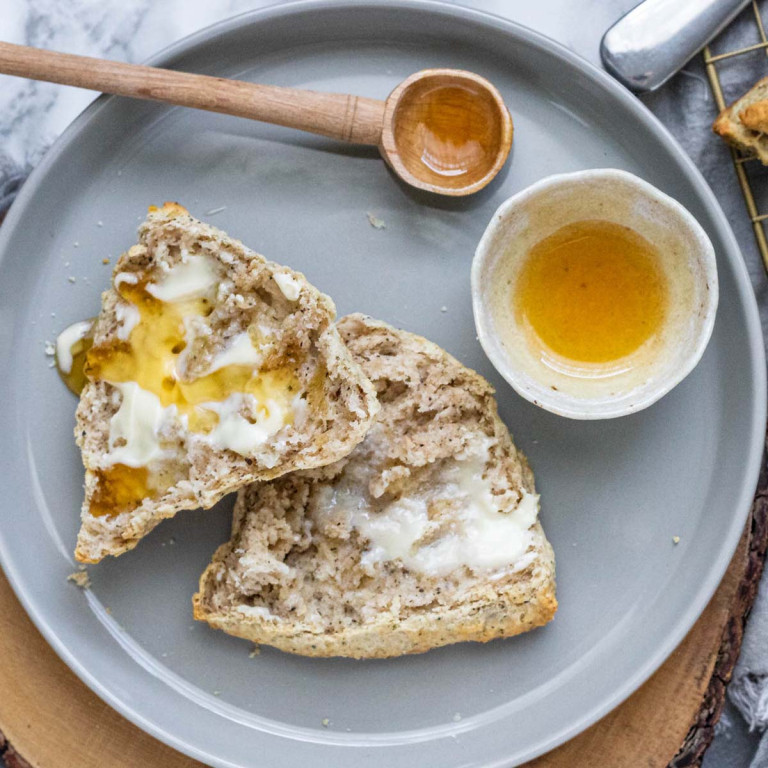
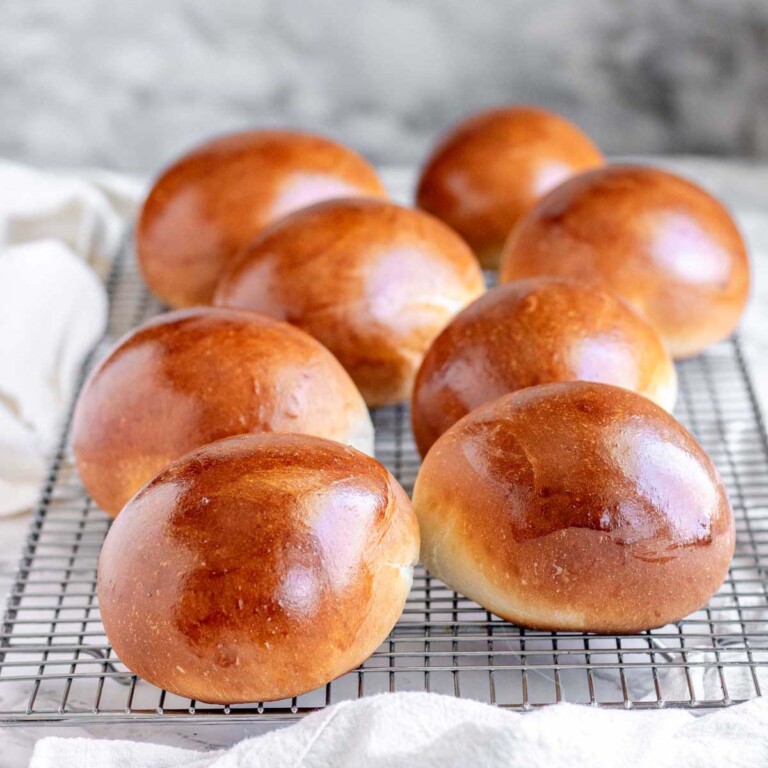
- Sugar: To feed the yeast. I’m sure you could use honey here, like in my brioche buns.
- Flour: I use all-purpose. Make sure to weigh the flour to get the most accurate measurements.
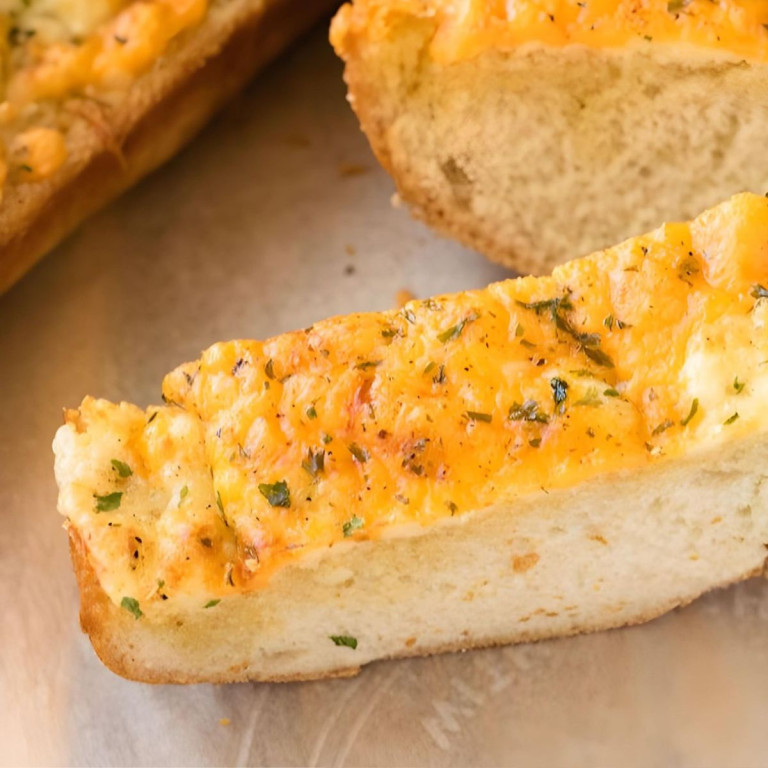
- Cheese: I use Mozzarella for the stretchy cheese pull effect and Gouda for added flavor.
- Egg yolk: Brushing the top of the dough before baking leads to a browner, shiny top.
Tips for Making Butter Bread
- Use freshly grated cheese for the smoothest melt.
- Let the shaped dough rise fully so the layers expand during baking.
- A springform pan makes removing the bread much easier.
Instructions
Prep Tips
Activate the Yeast
Warm the milk to 110°F to 115°F. You can do this in the microwave for about 30-45 seconds. Whisk in the yeast and sugar. Let it sit for about 5 minutes until the surface looks foamy and smells slightly yeasty. If nothing happens, the yeast is likely expired or the milk was too hot or too cold.
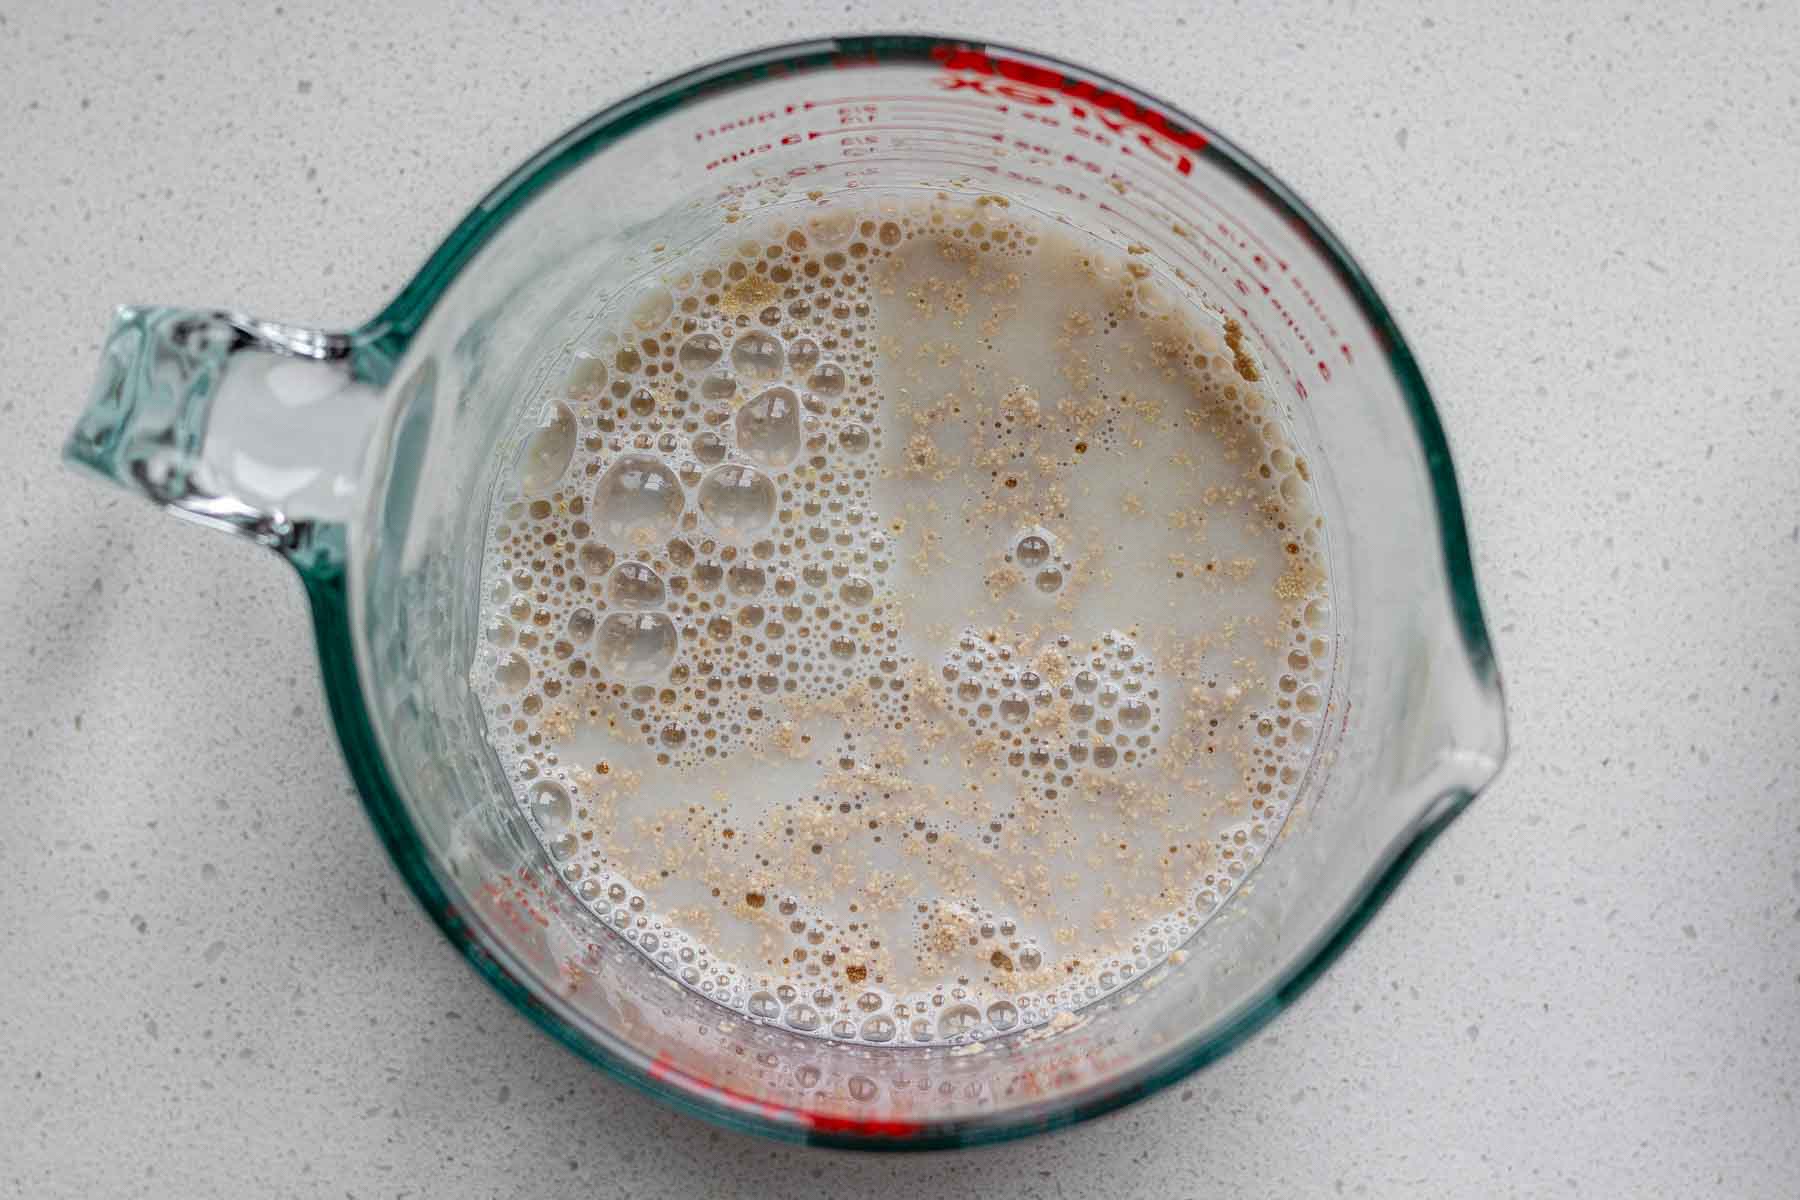
Just after mixing.
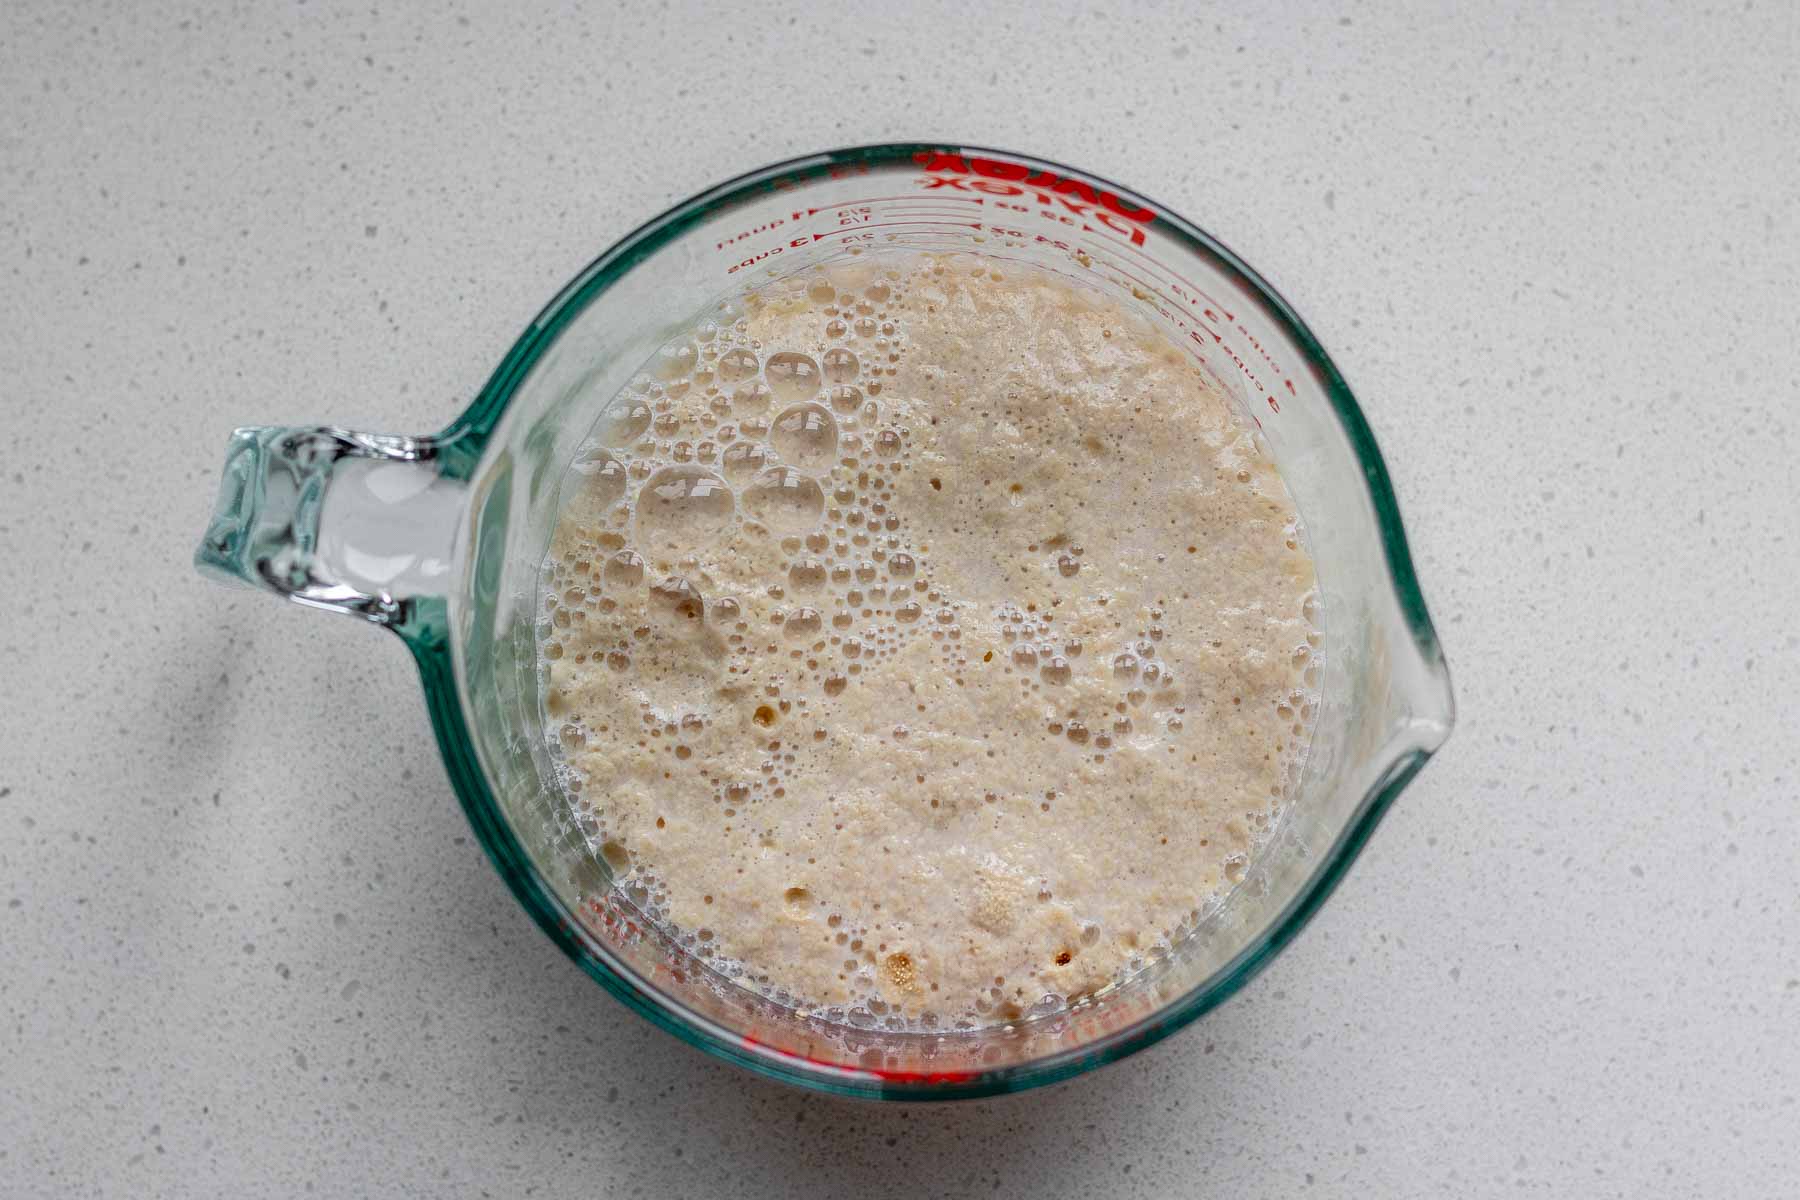
5 minutes after mixing. You can see how foamy it is.
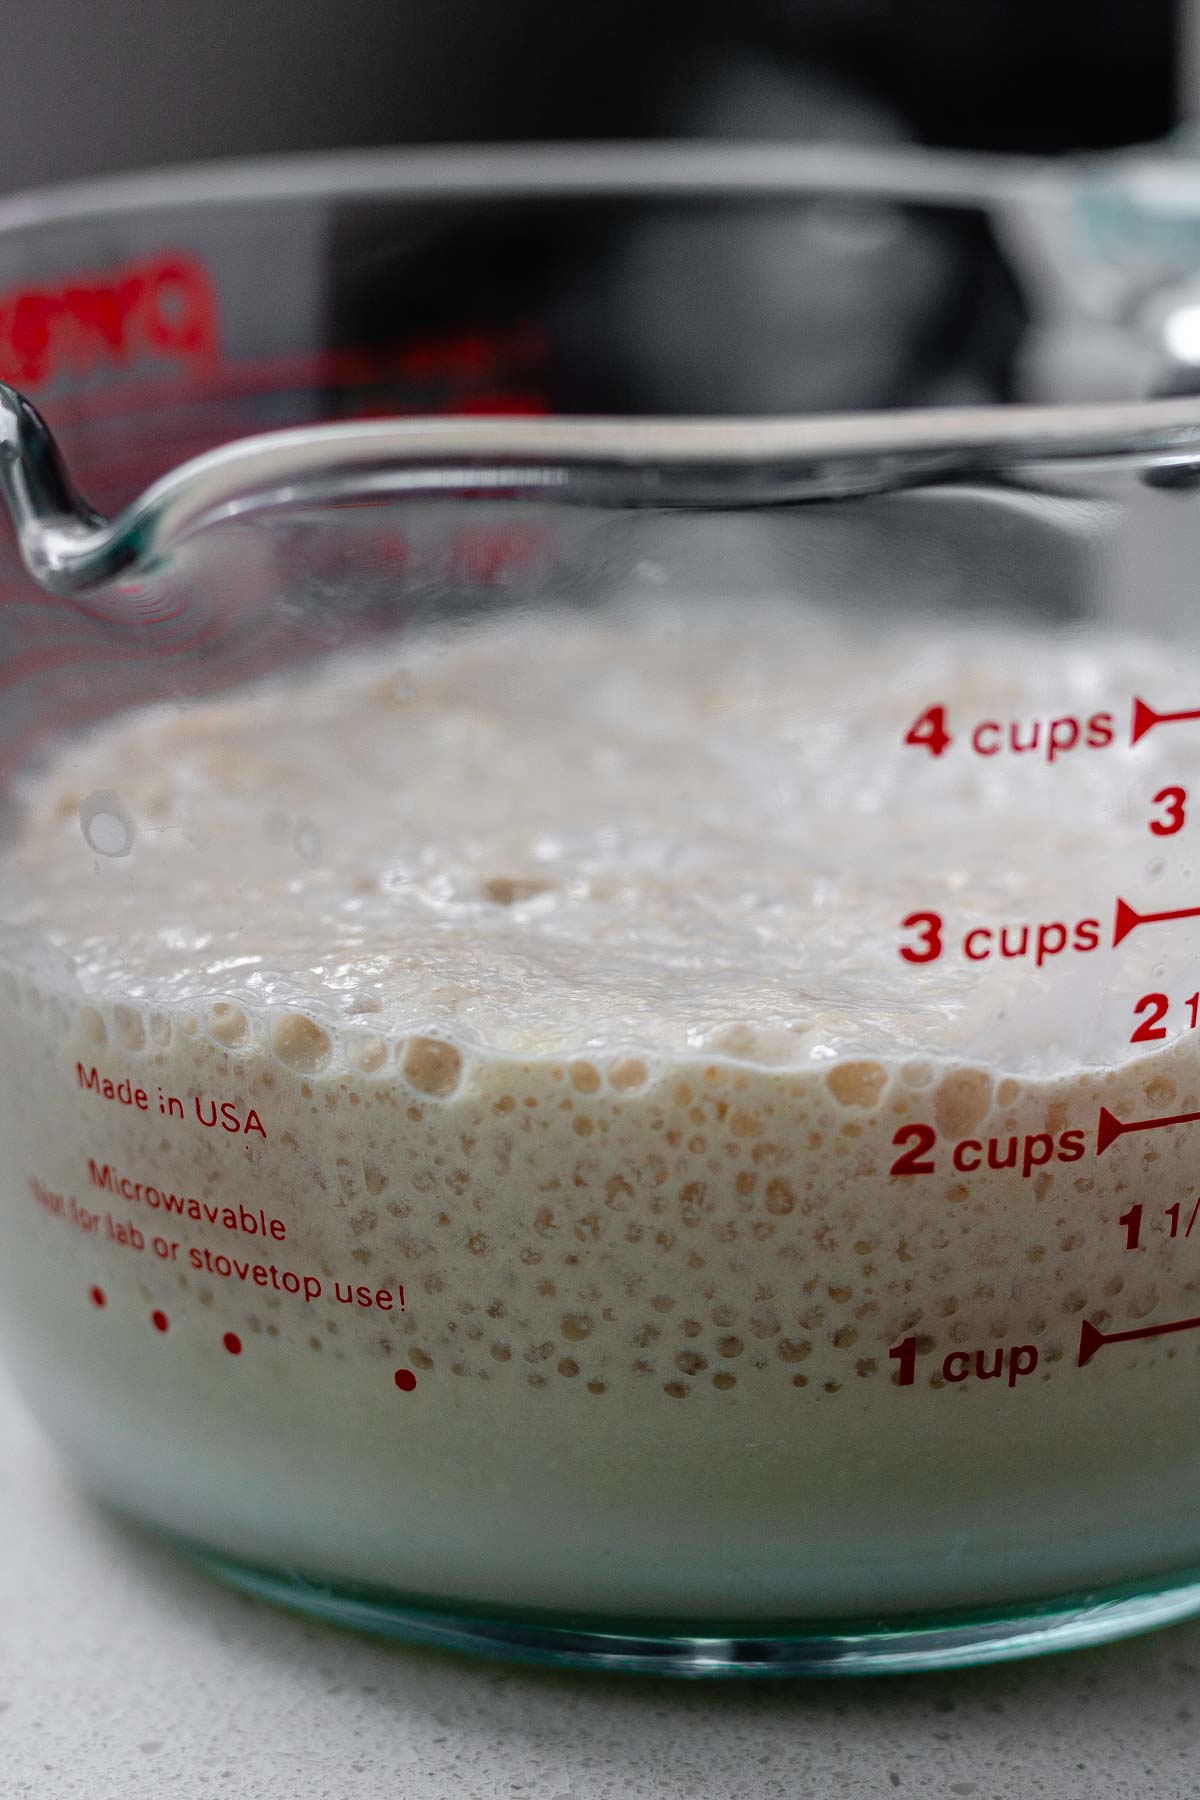
Here you can see how much the yeast bubbled. This is Red Star active dry yeast, and I get mine from Costco, and it’s my favorite to work with!
Make the Dough
In the bowl of a stand mixer, whisk the flour and salt together so the salt is evenly distributed.
In a small bowl, whisk the eggs with the olive oil until smooth and well combined.
Make a well in the center of the flour and pour in the yeast mixture and the egg mixture. Using the dough hook, mix on low speed until all of the flour is incorporated. The dough will look shaggy at first and then start to come together into a soft ball after 2 to 3 minutes.
Increase the mixer speed to medium-low and knead for about 5 minutes. The dough should be very soft, slightly sticky, and stretchy. It should pull away from the sides of the bowl but still stick slightly to the bottom.
If you are kneading by hand, expect this to take 8 to 10 minutes. The outside should look mostly smooth but feel tacky.
Cover the bowl and let the dough rise in a warm spot until doubled in size, about 45 to 60 minutes. I use plastic wrap to prevent a skin from forming on the dough and a towel on top of that to keep it warm.
Line the bottom of a springform pan with parchment paper and brush the sides with olive oil. This helps the bread release cleanly after baking.
Gently deflate the dough and divide it into 8 equal pieces.
Pinch the edges of the dough into a point to form a rough circle.
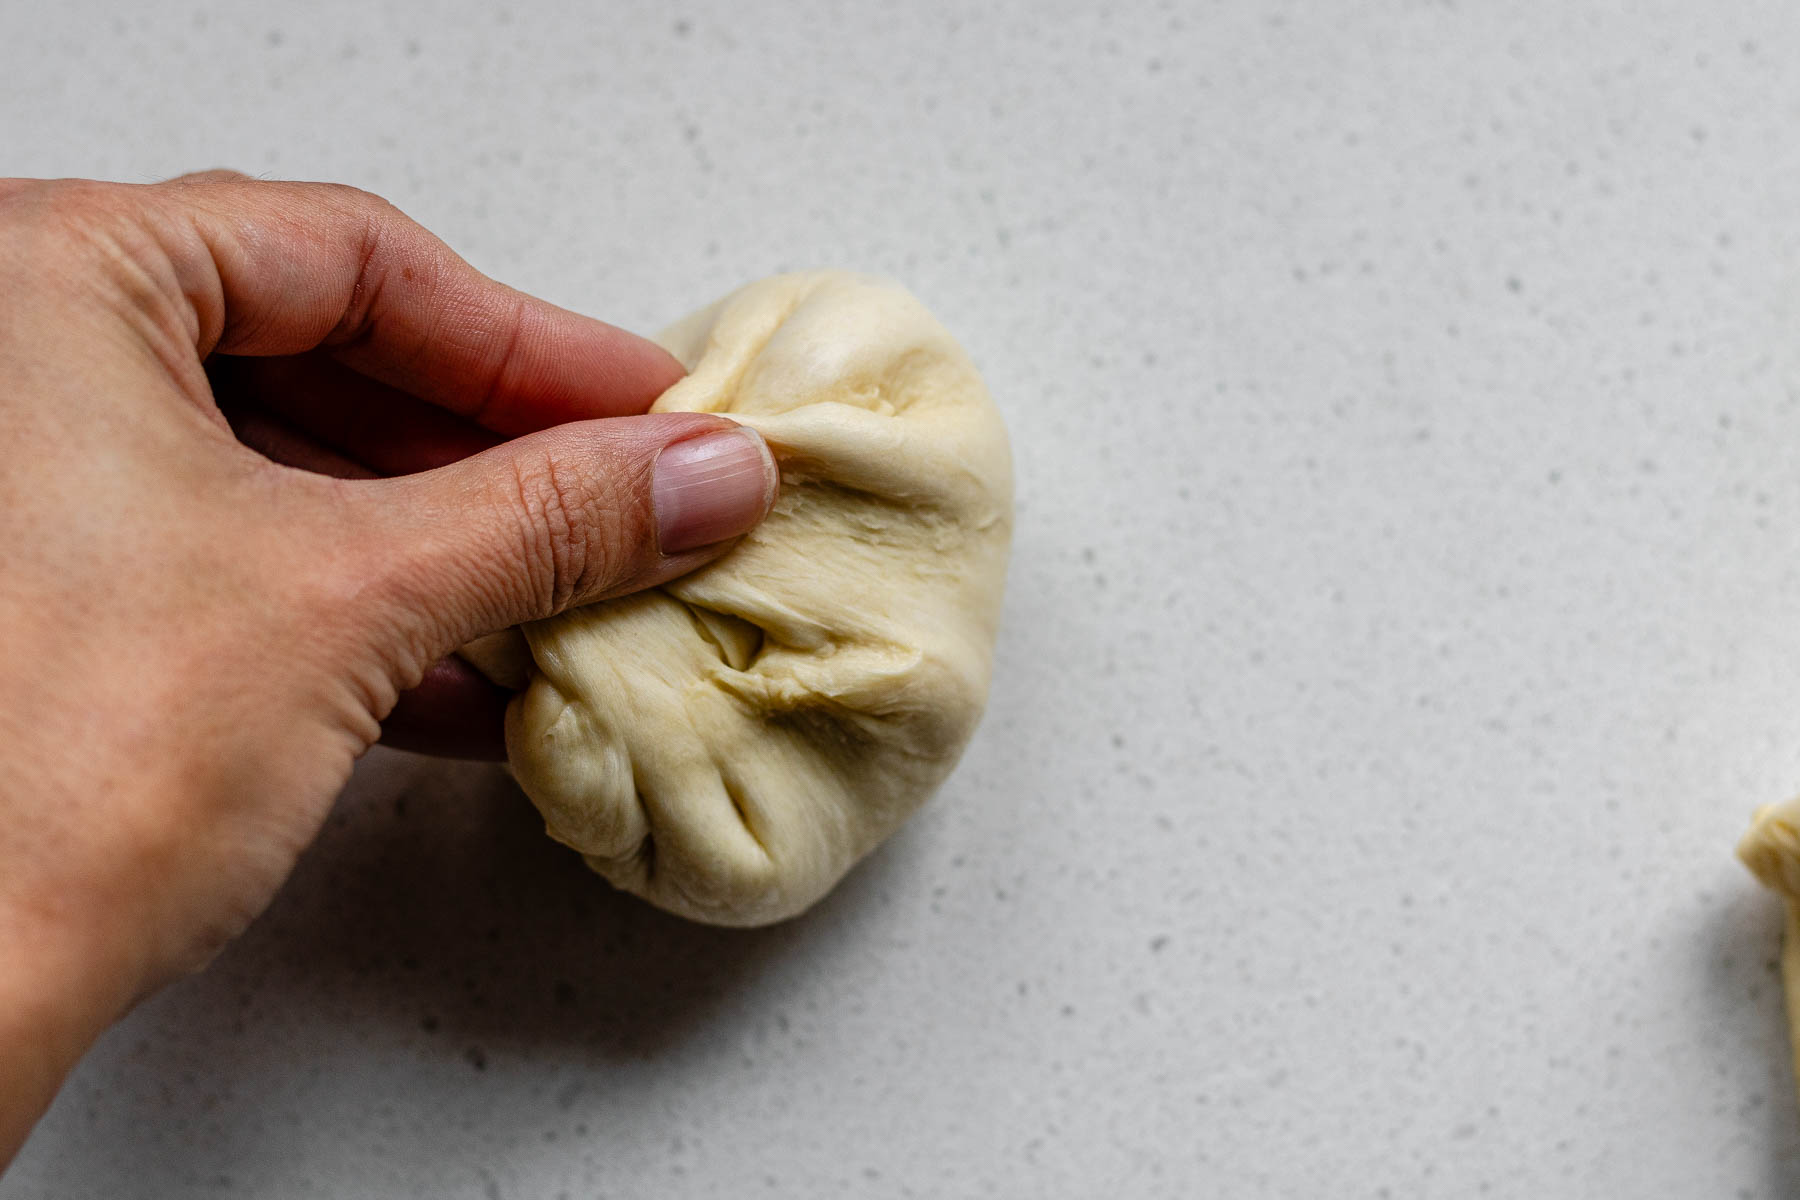
Turn the dough seam side down, cup your hand over the top, and roll it in circles on the counter until it forms a nice ball.
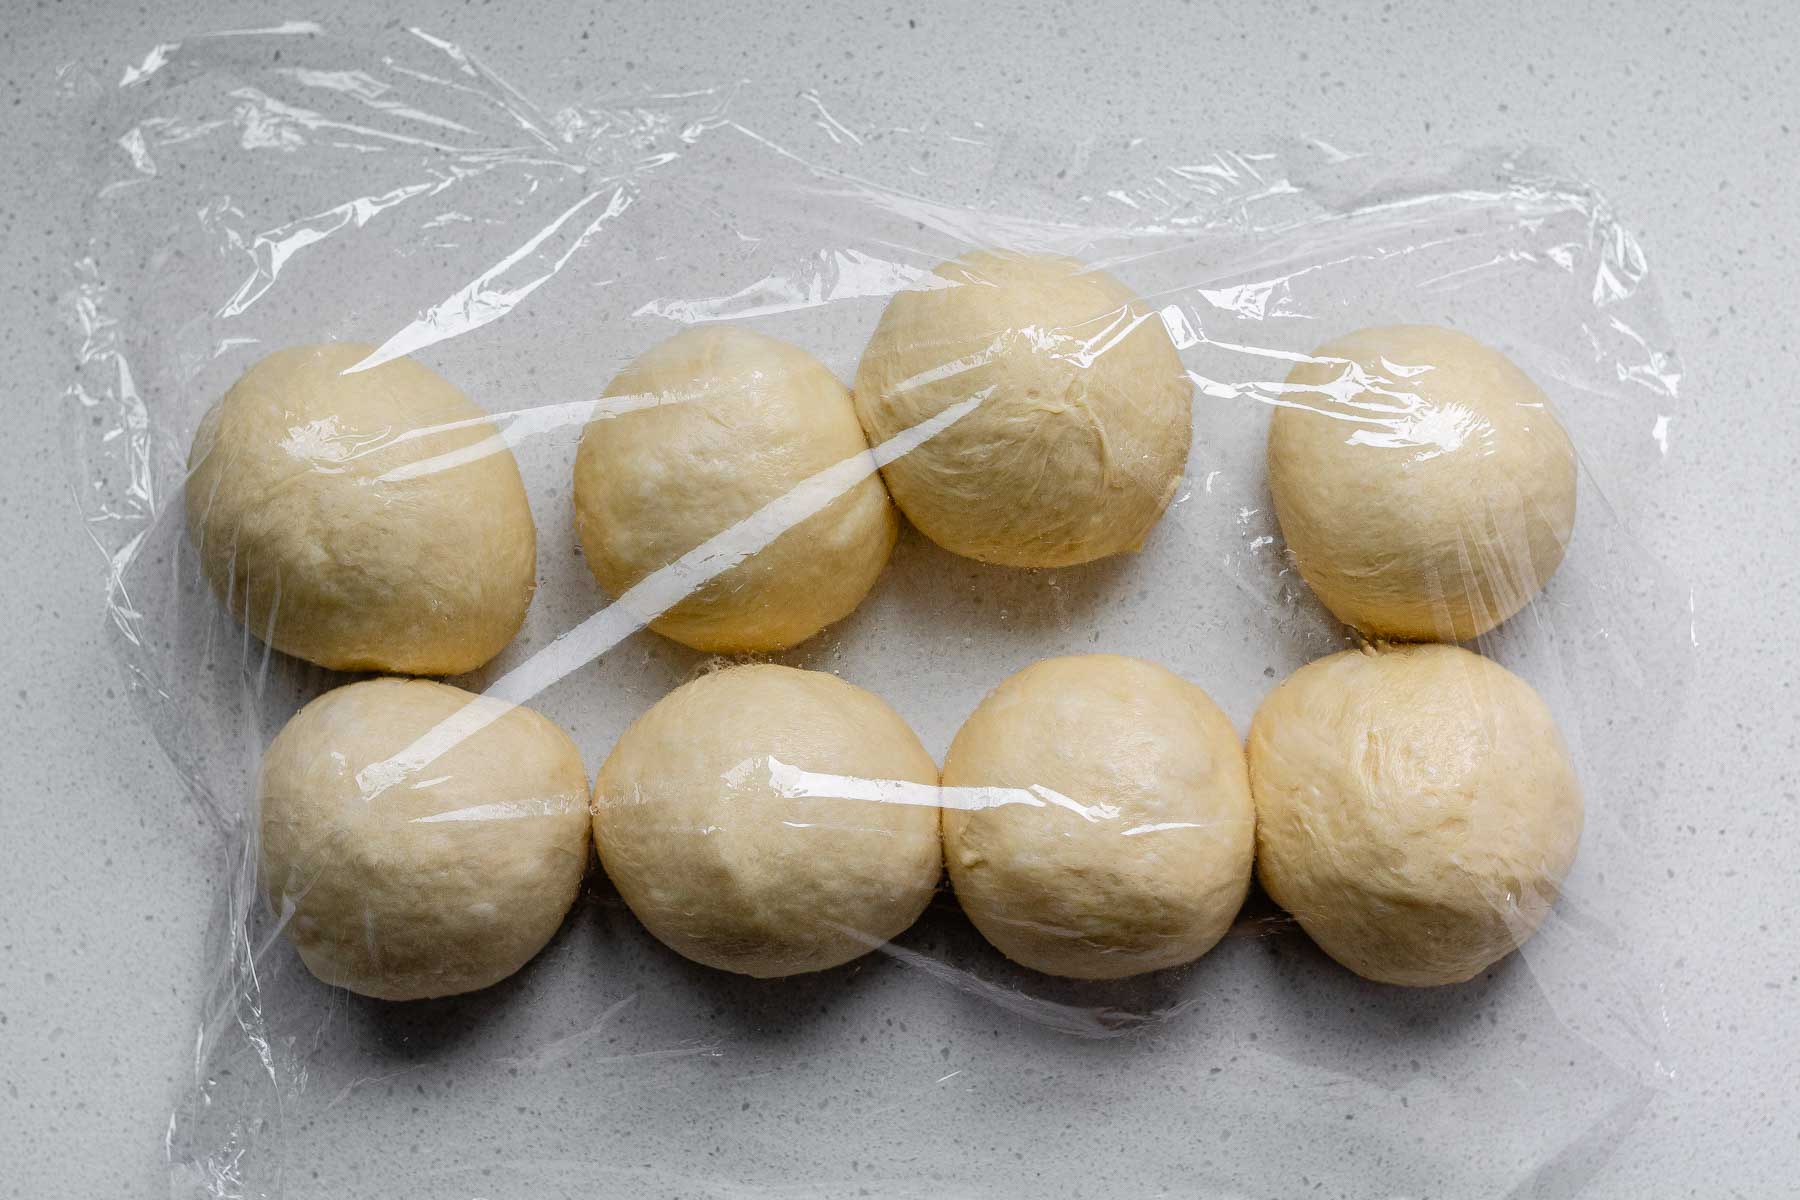
Cover and let them rest for 10 minutes so the gluten relaxes. This makes rolling easier.
How to Shape Serbian-Inspired Butter Bread

Roll each ball into a rectangle about 4 by 8 inches.
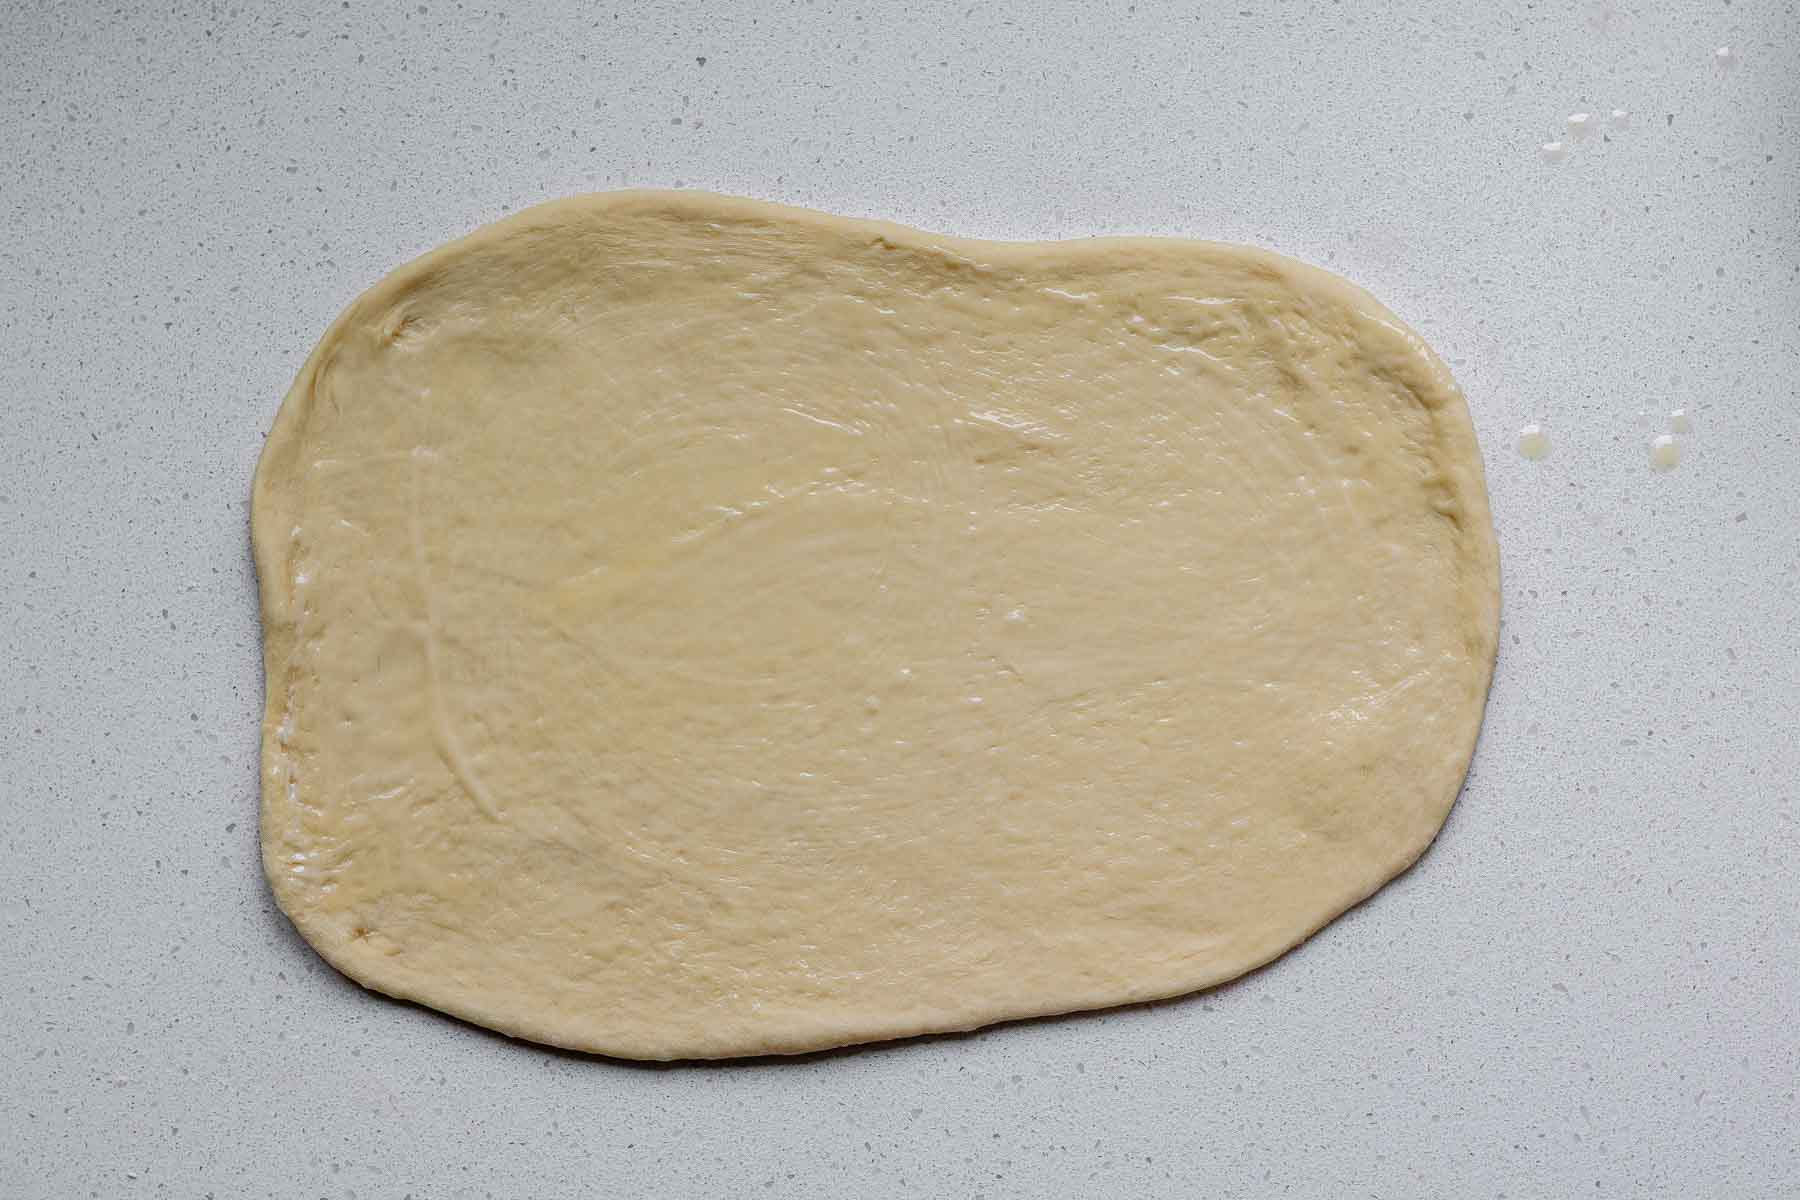
Brush one rectangle with melted butter, all the way to the edges.
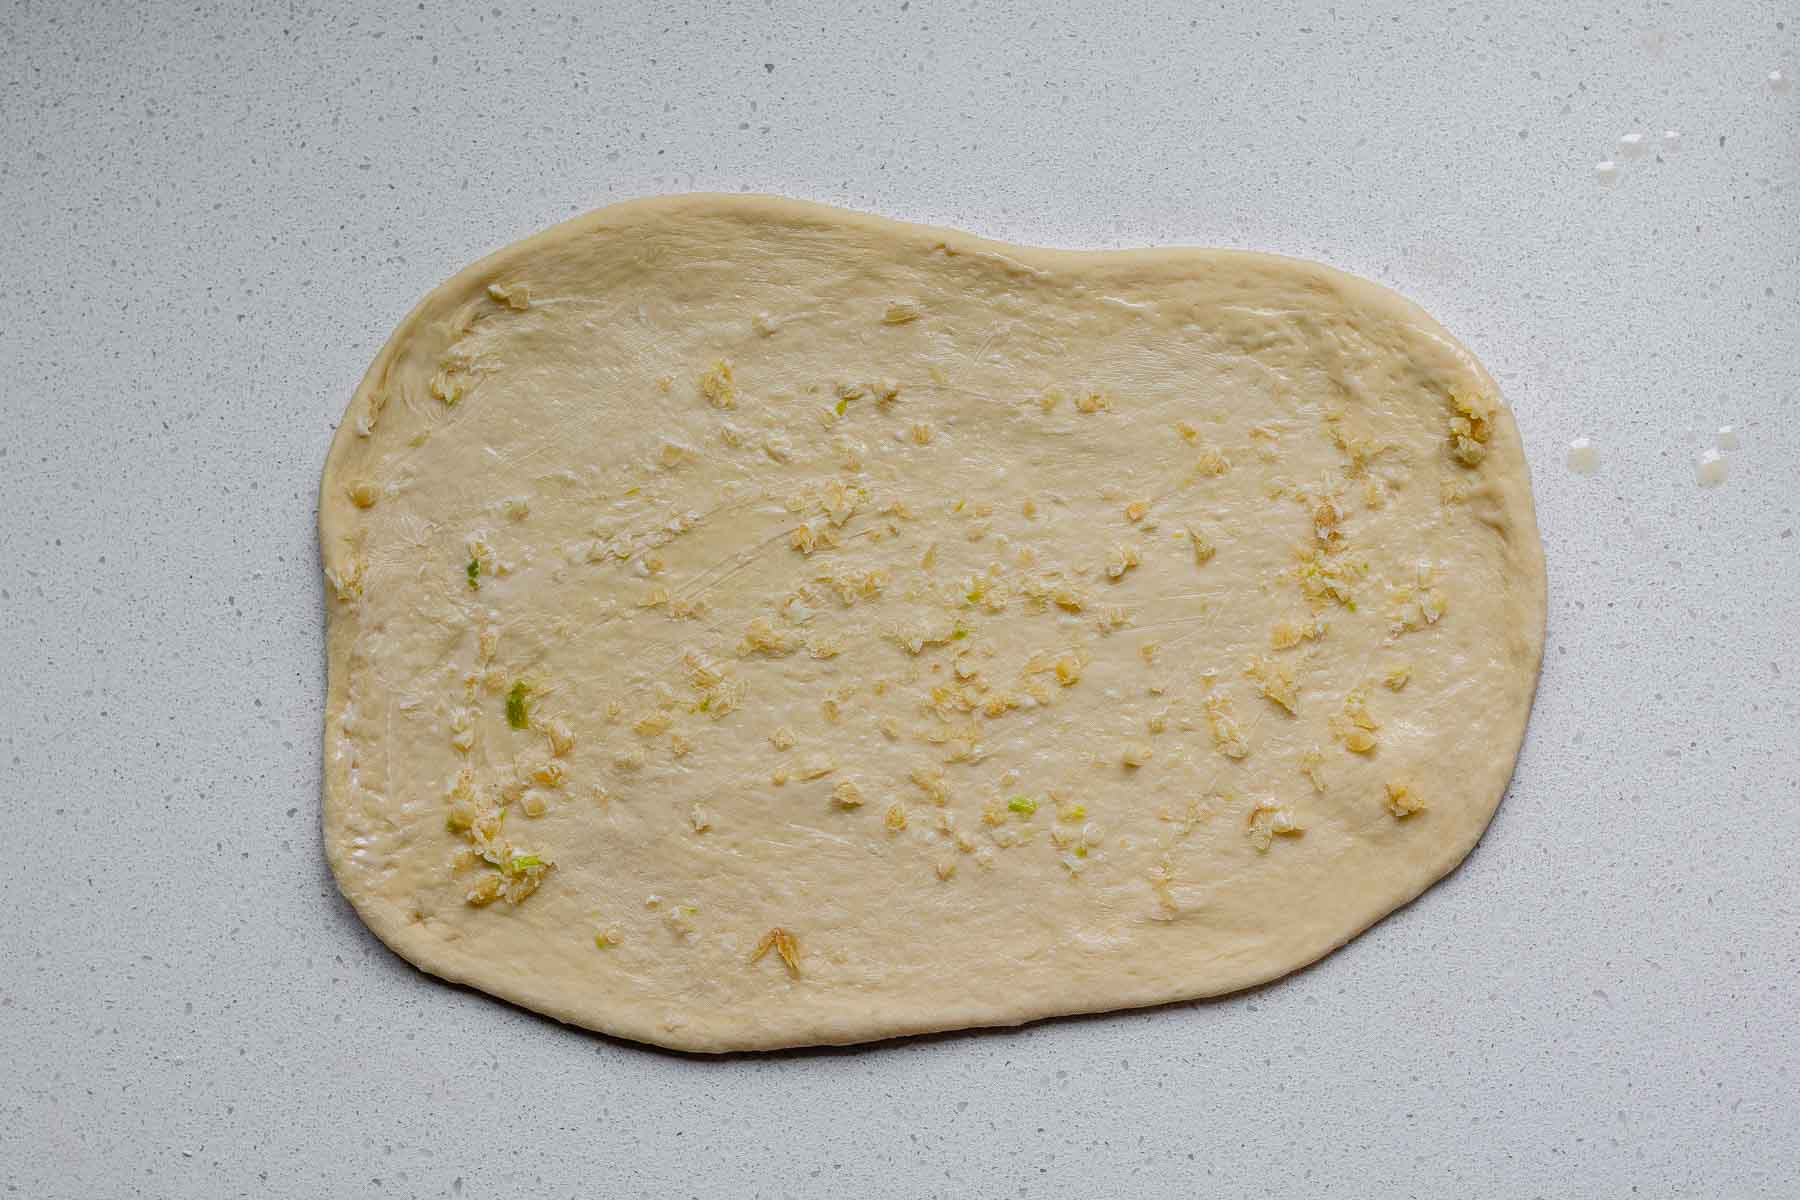
Sprinkle with a quarter of the garlic.
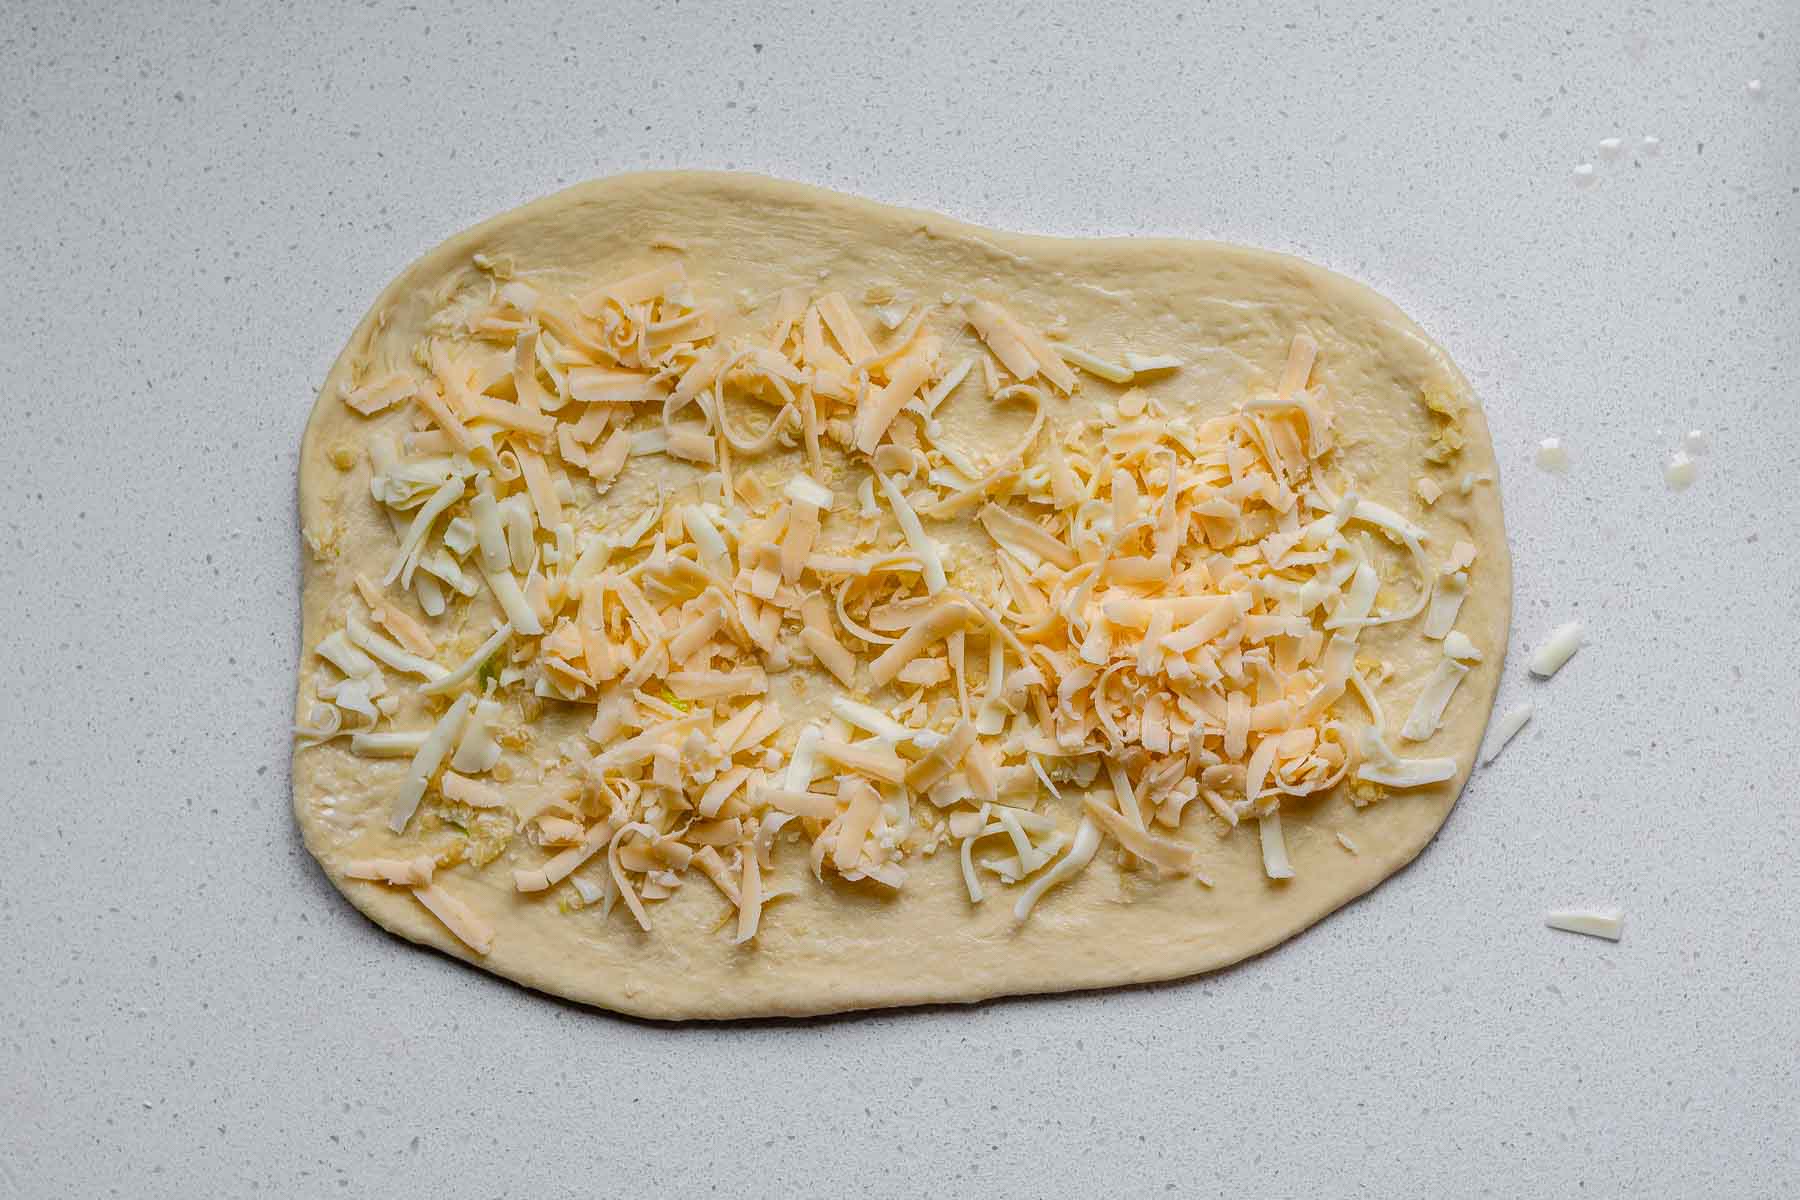
Add almost a quarter of the cheese mixture.
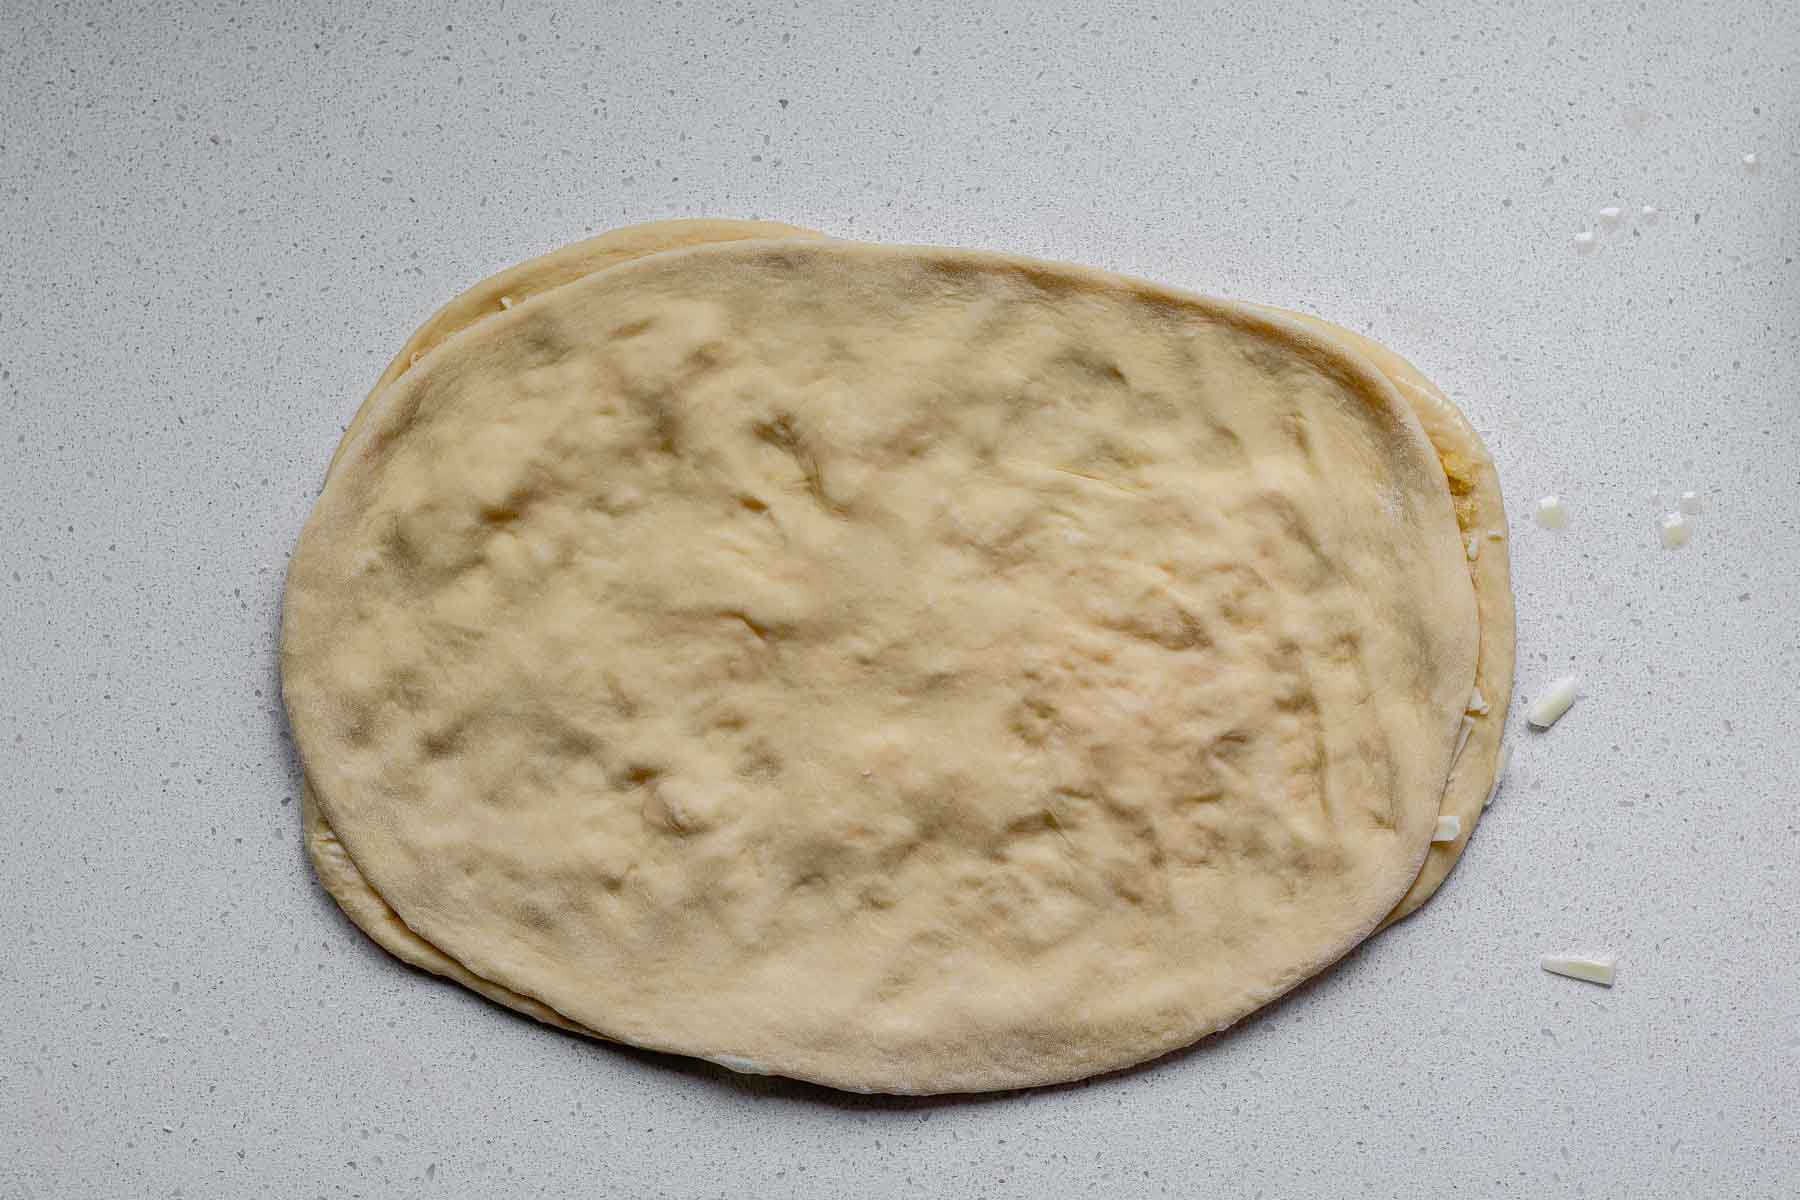
Place another rectangle on top and gently press to seal.
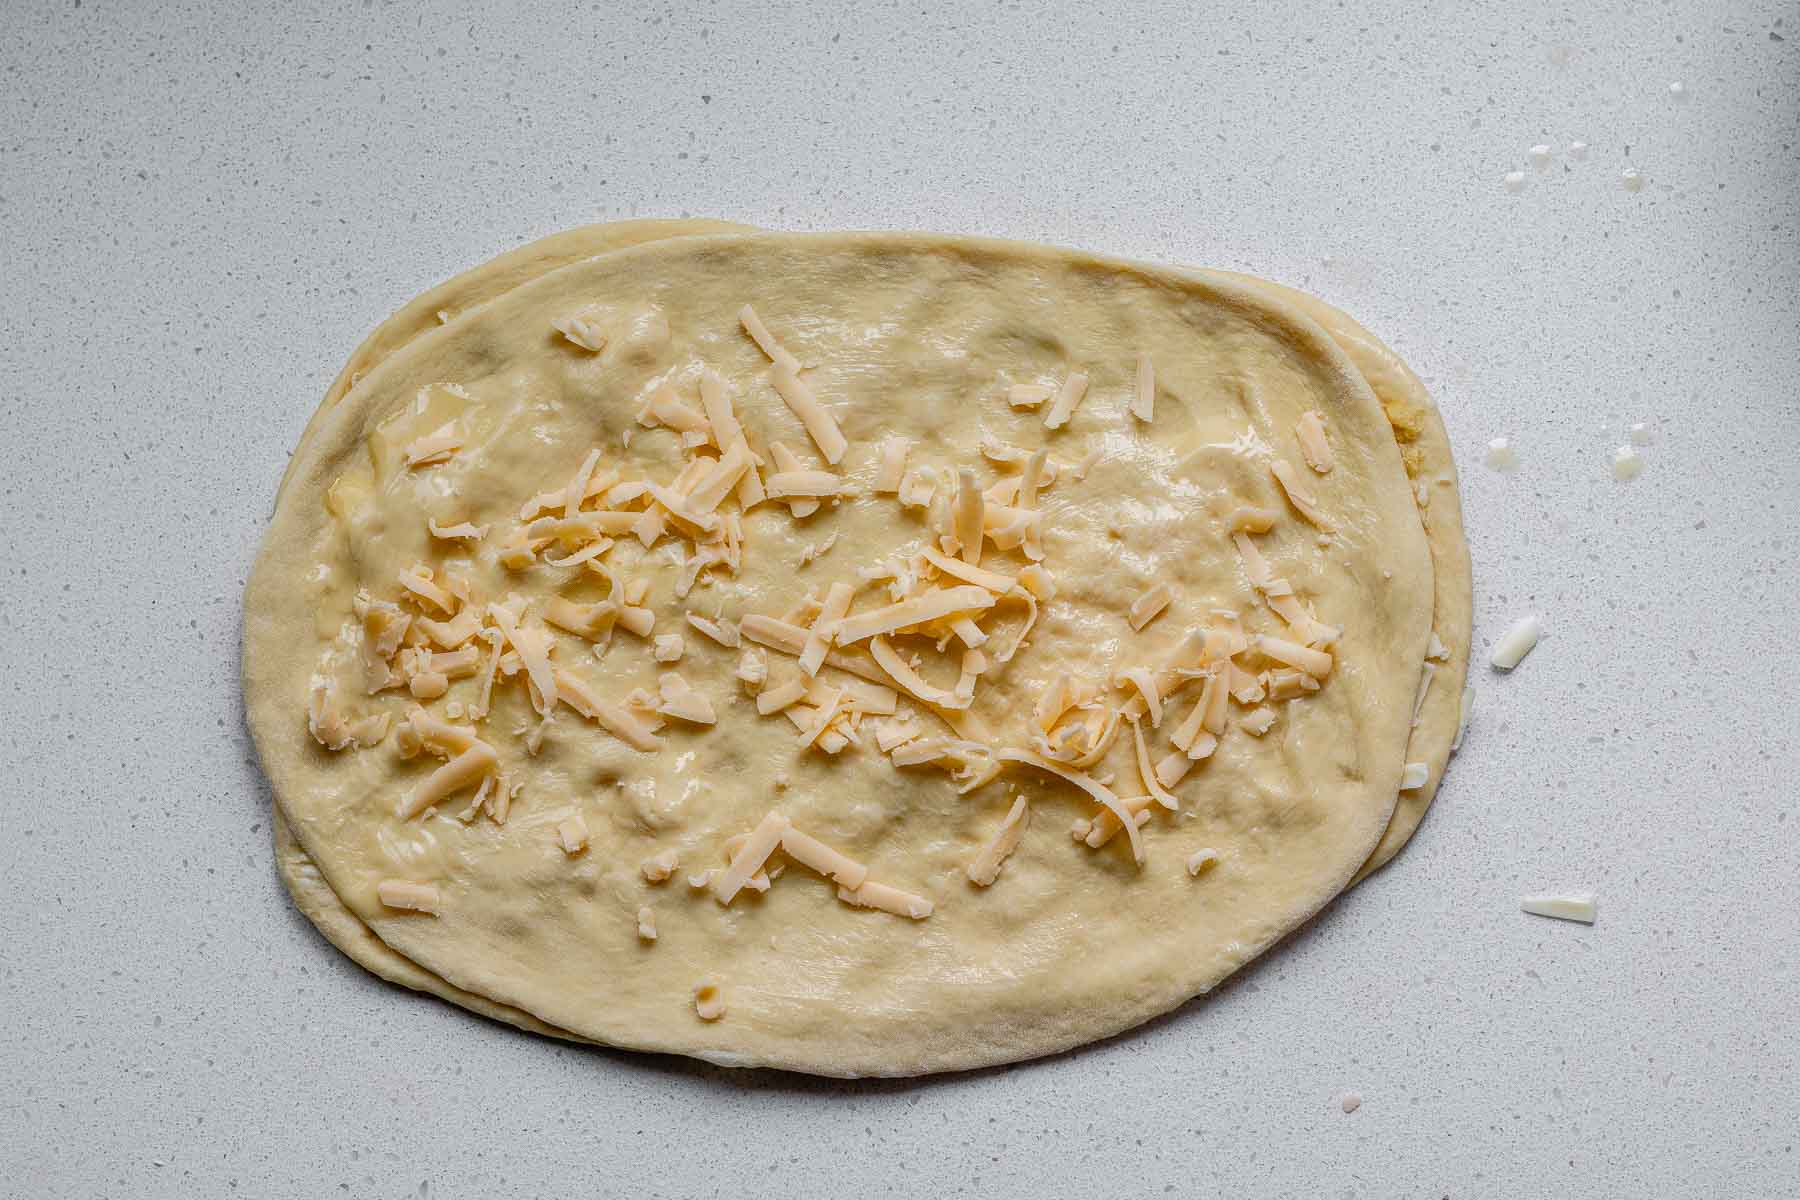
Brush with melted butter and add a little more cheese.
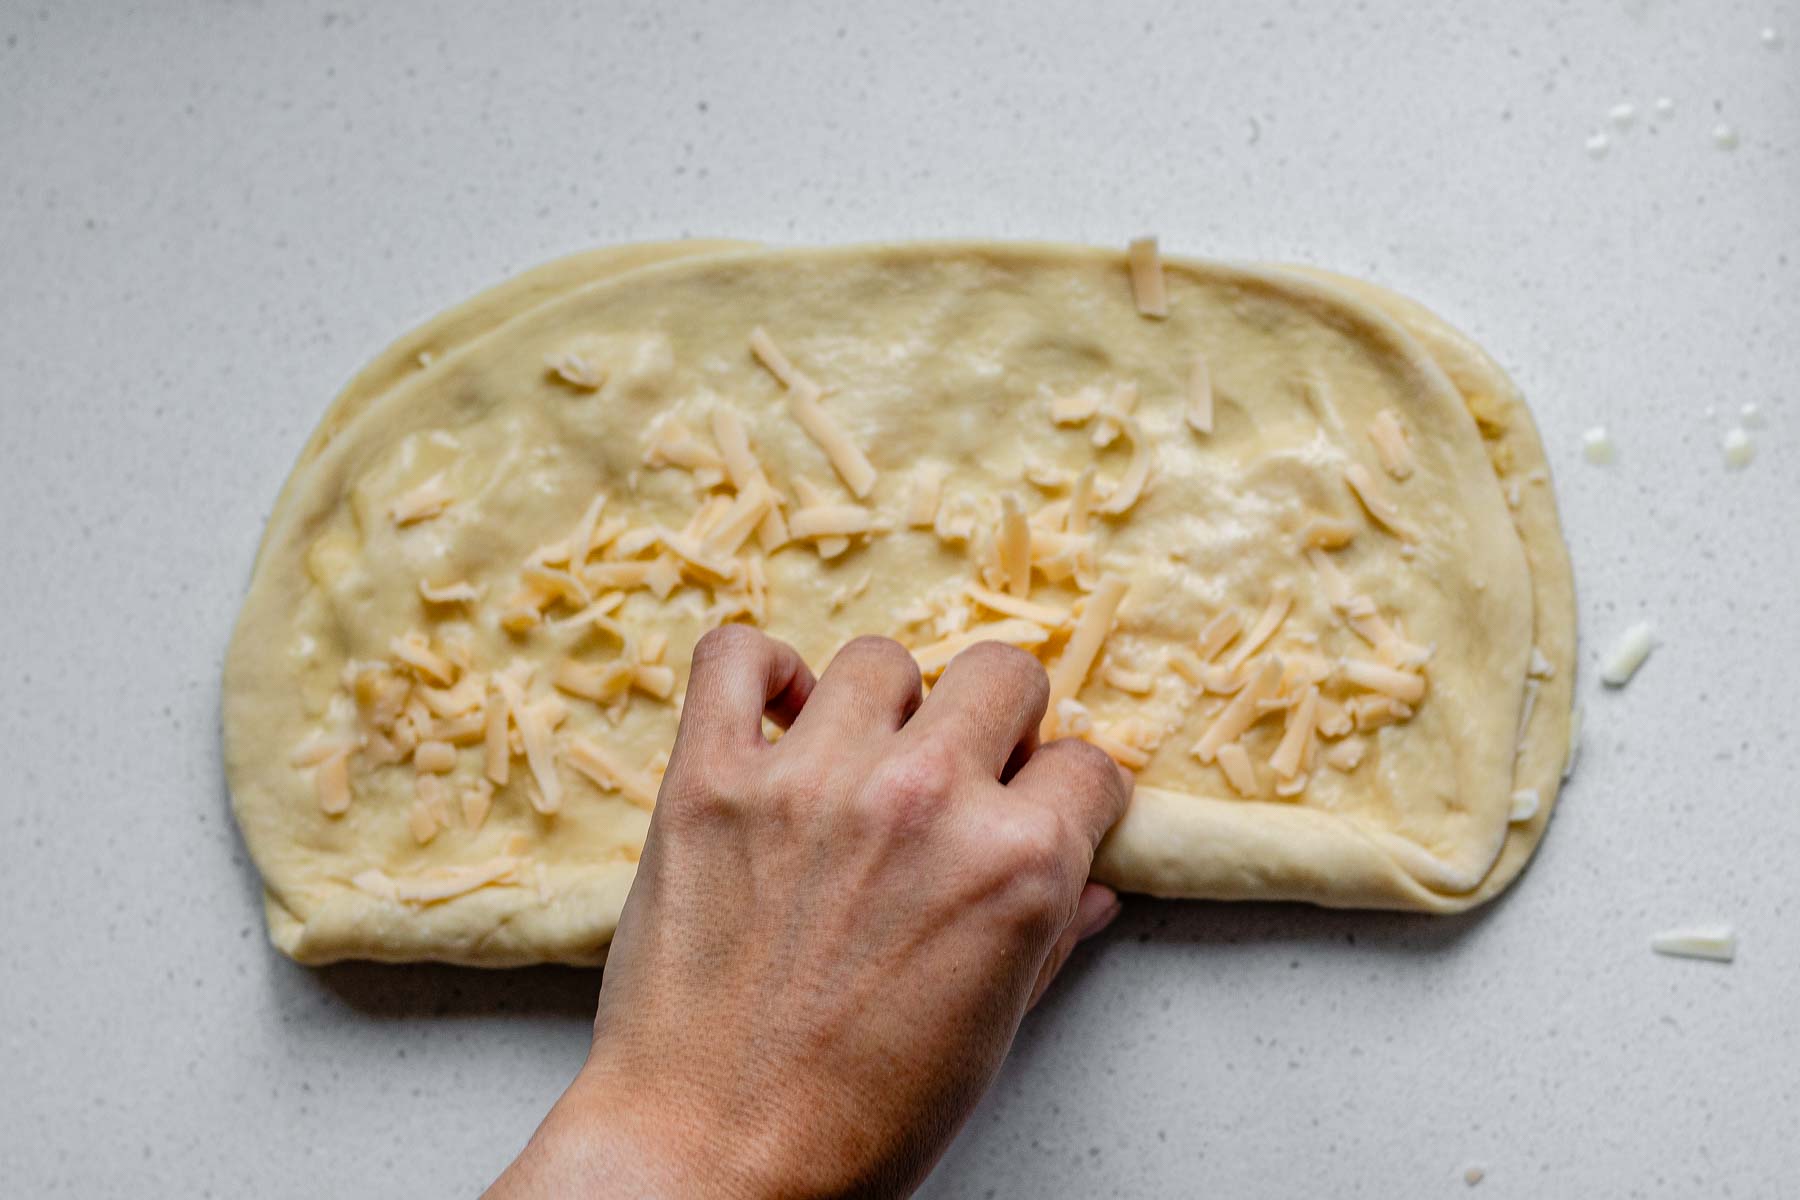
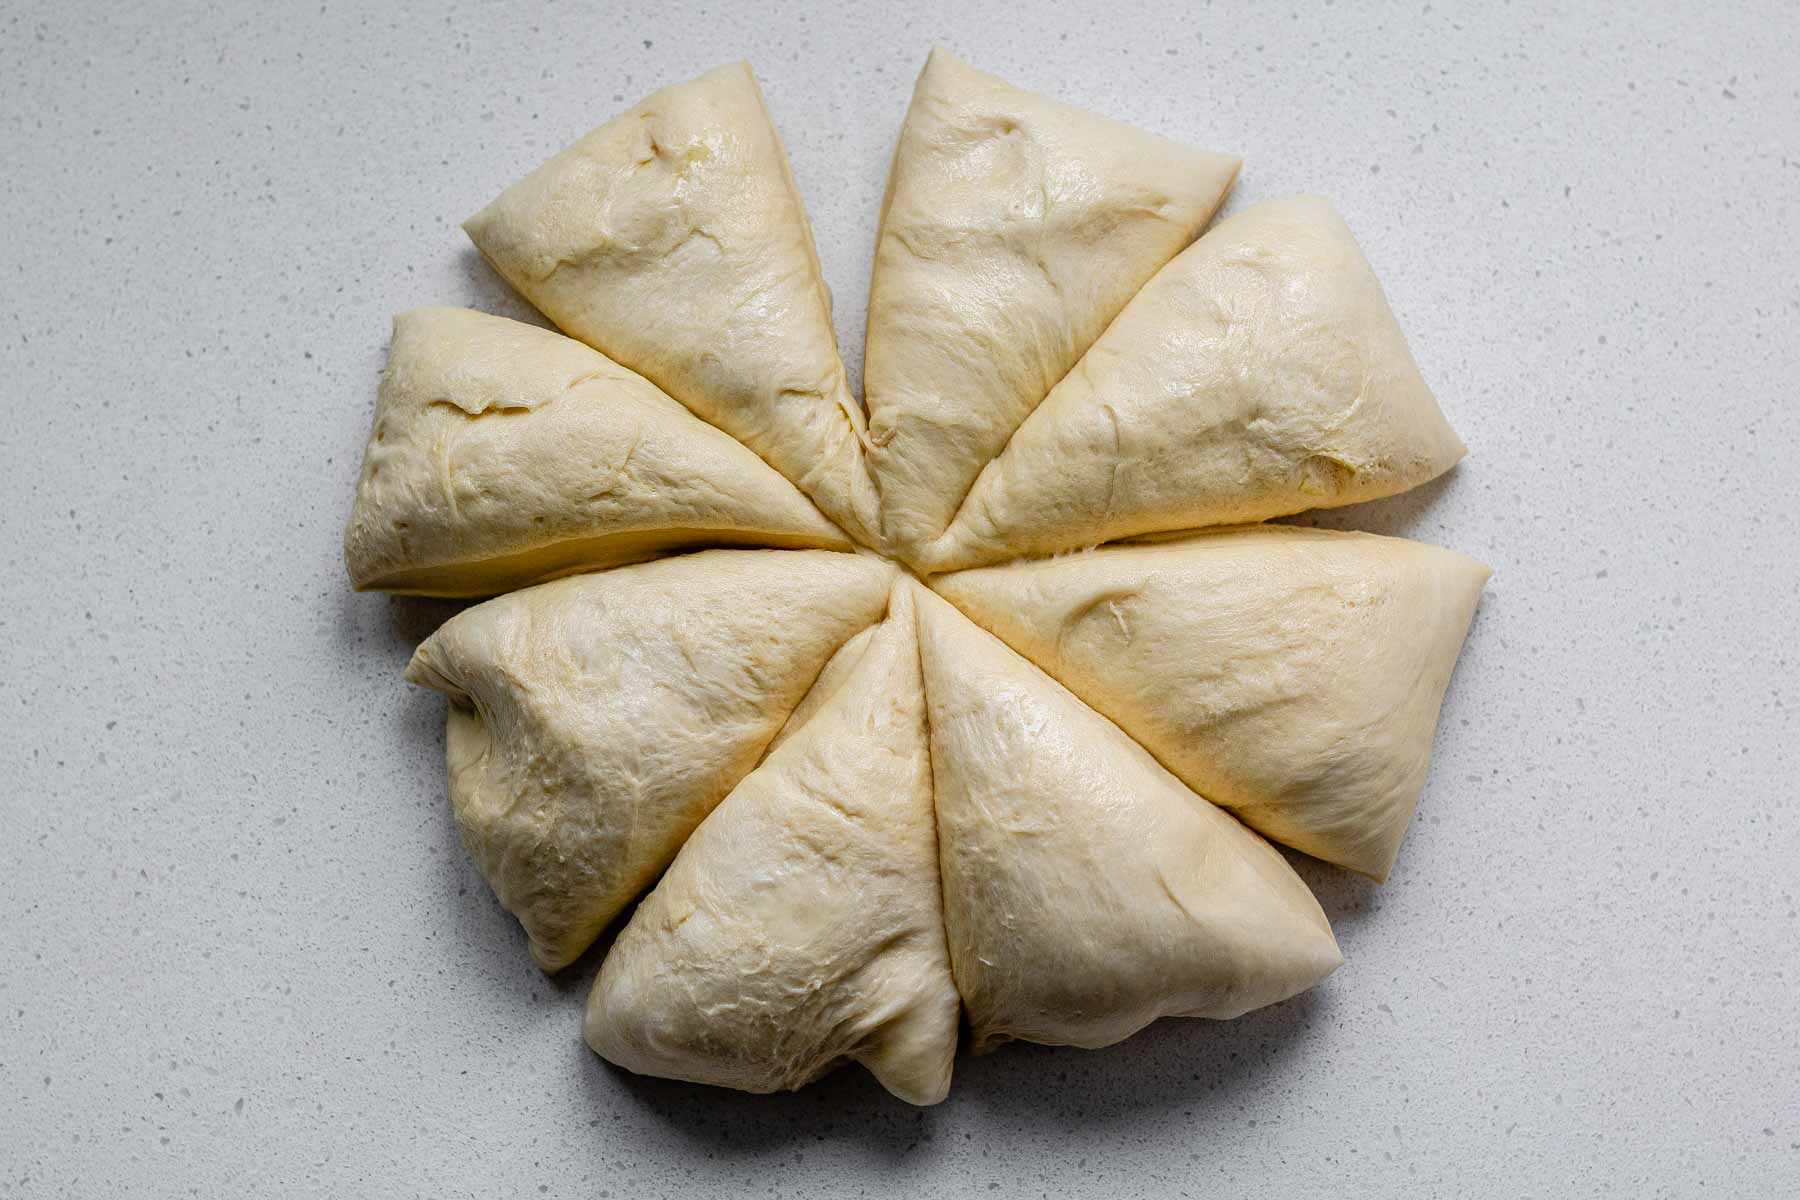
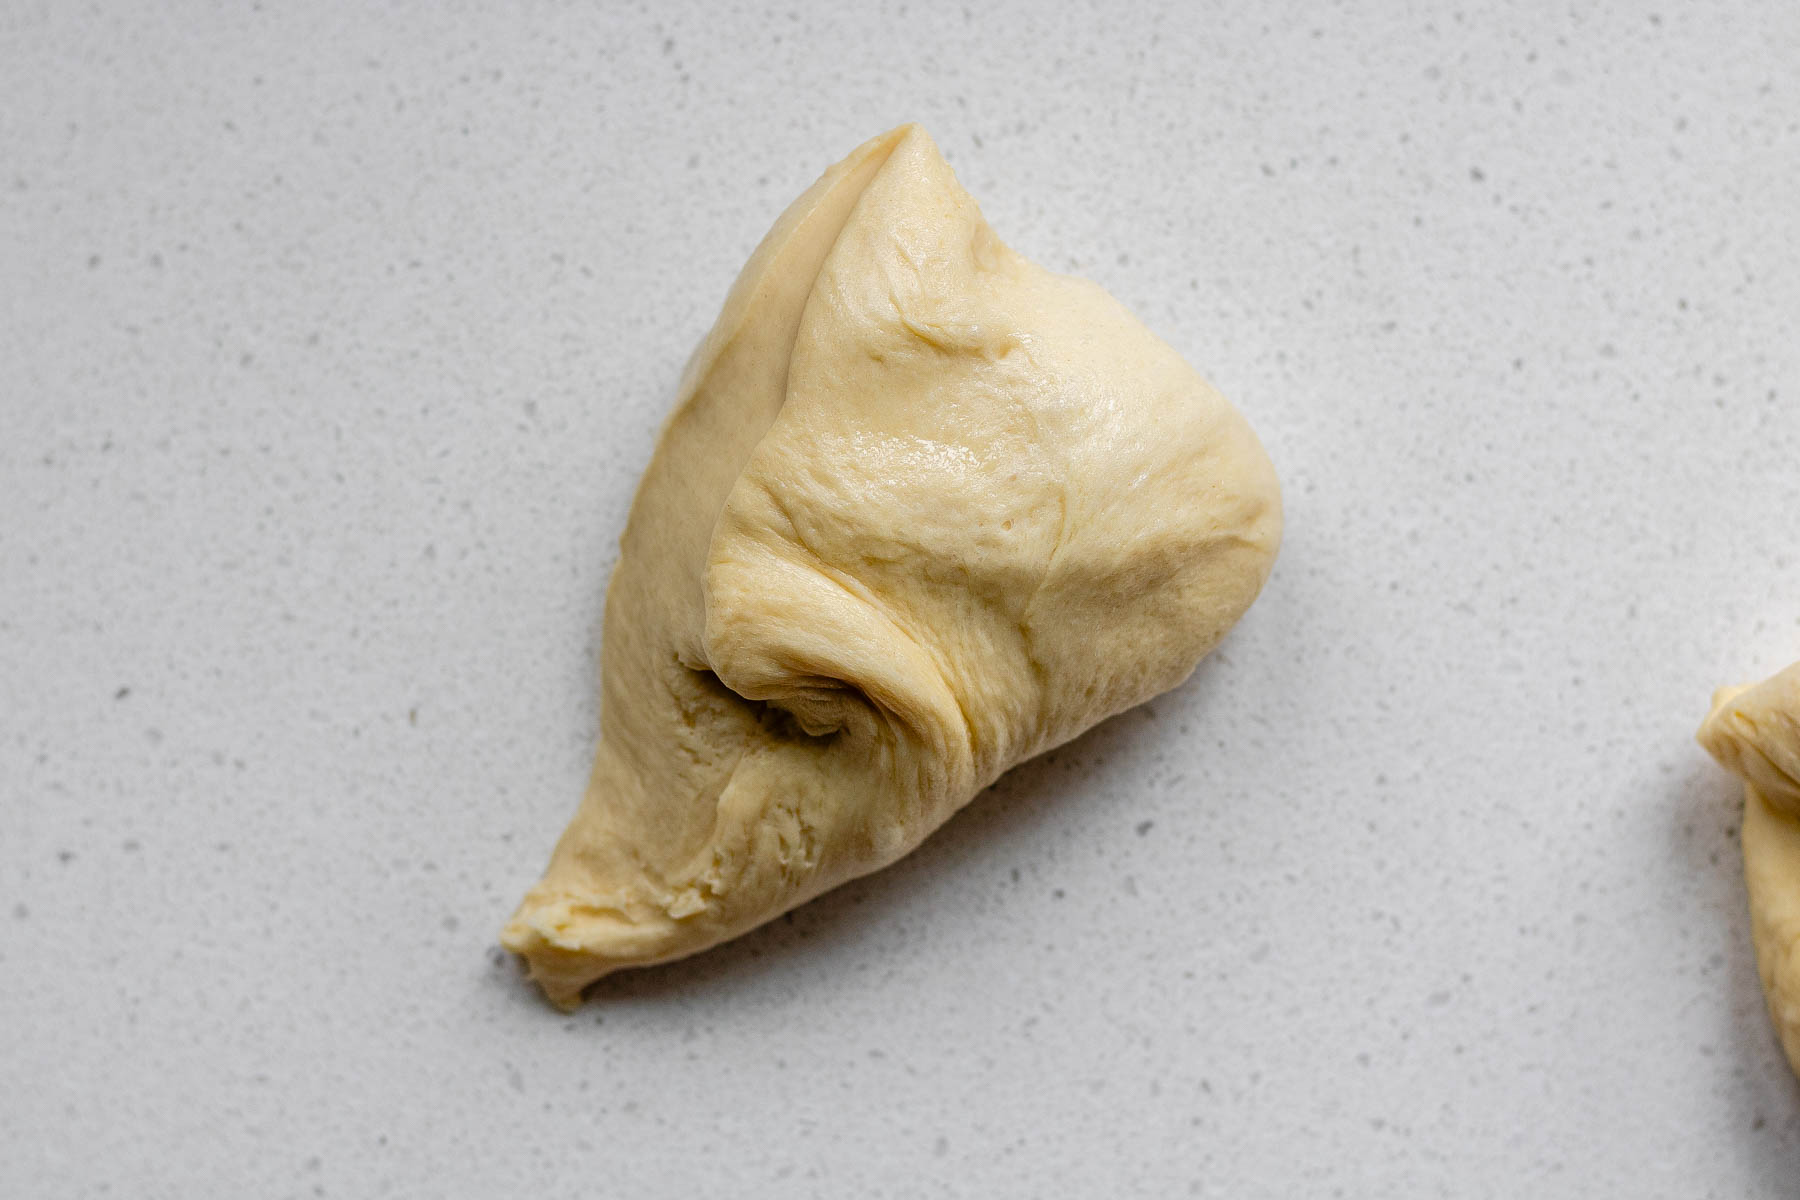
Starting from the long side, roll the stacked dough into a log, similar to a cinnamon roll.
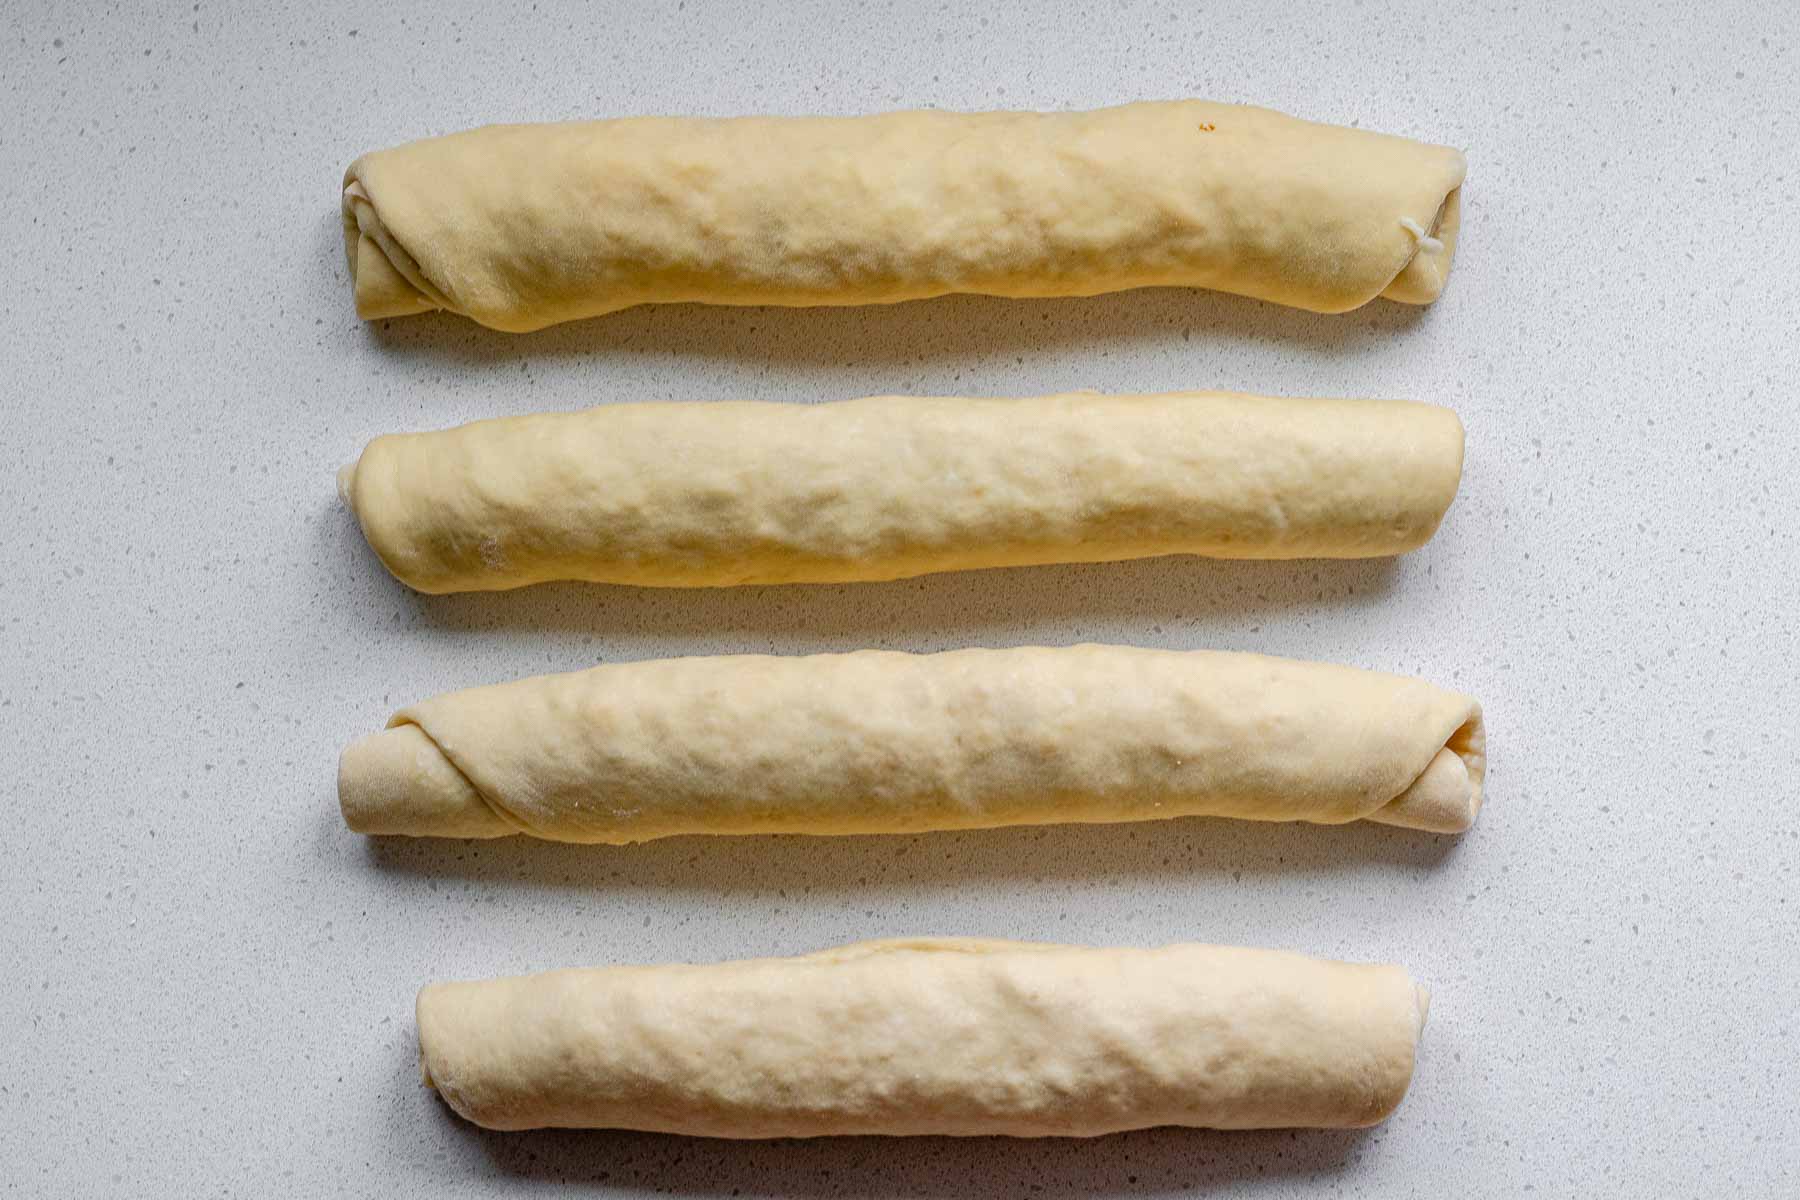
Repeat until you have 4 logs total.
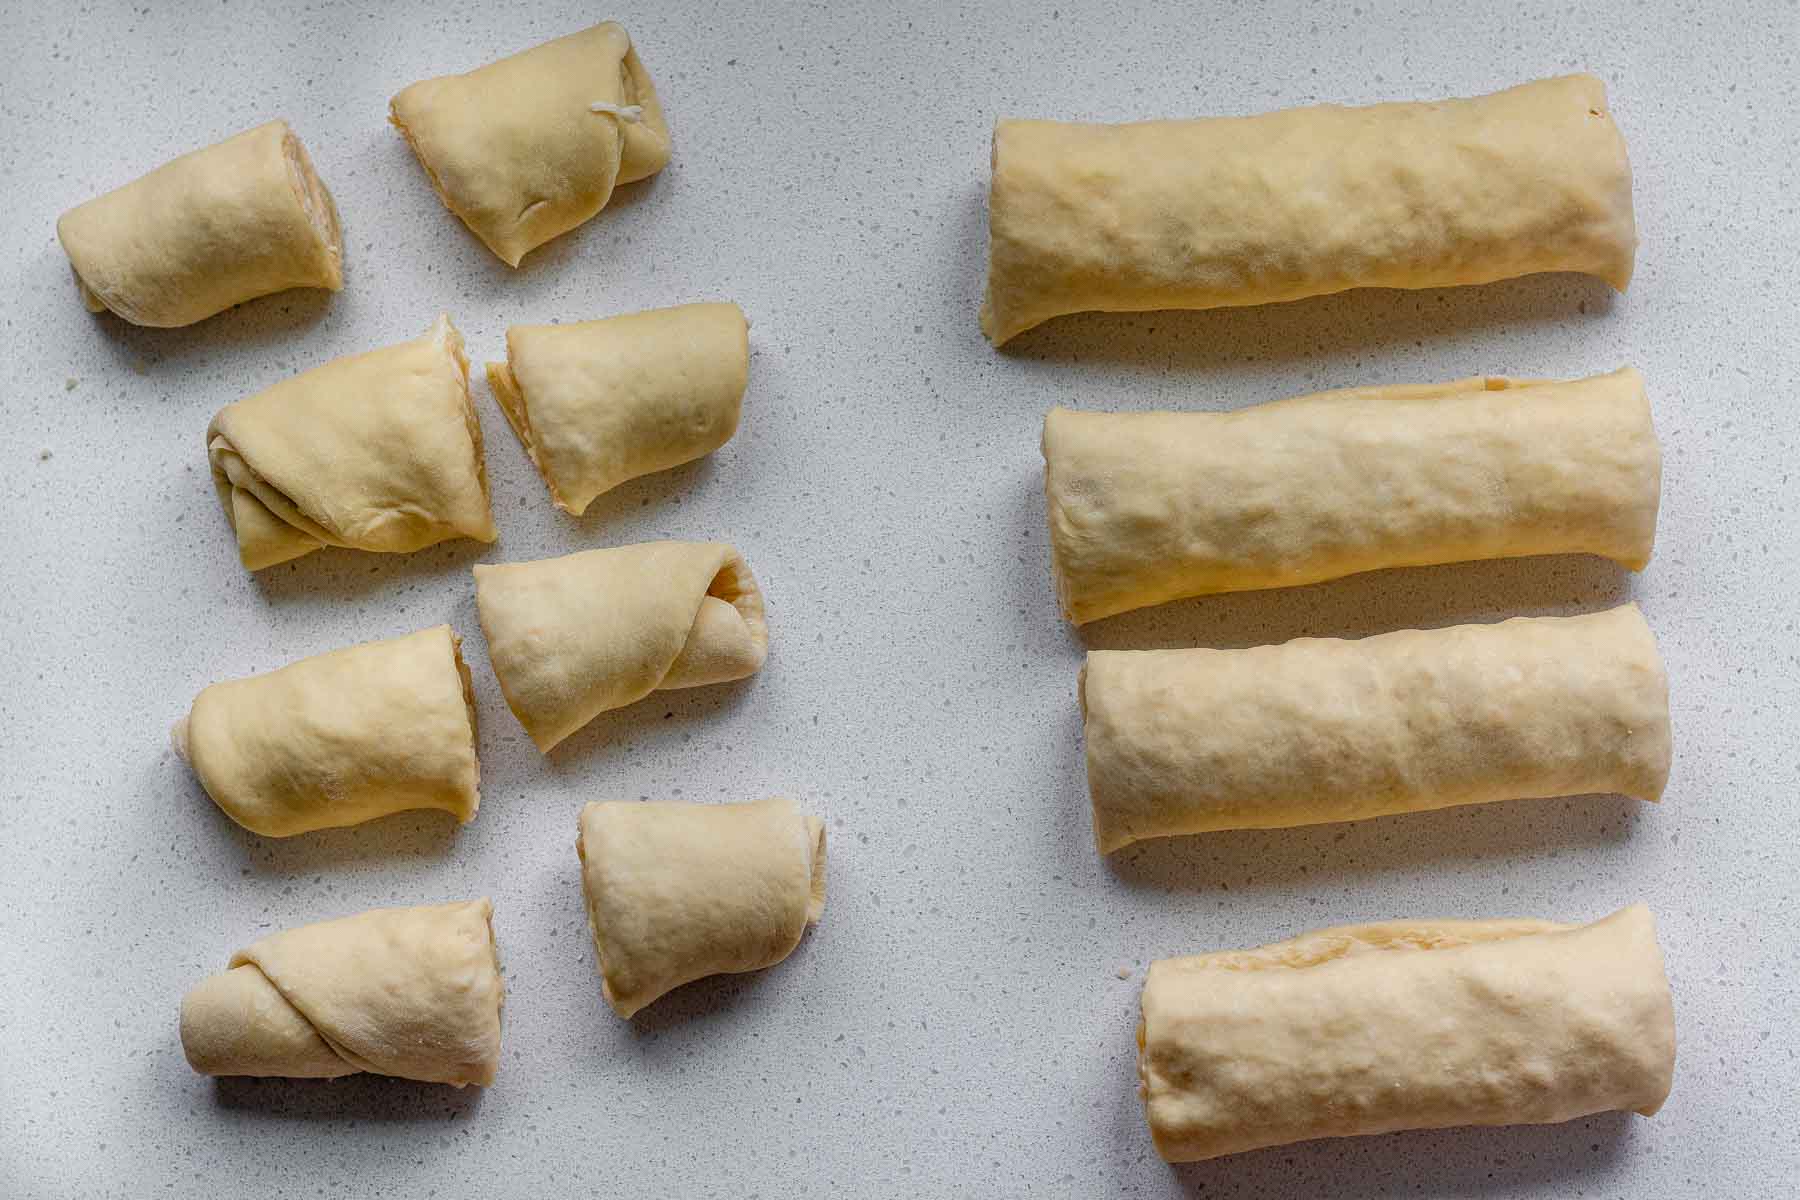
Cut the ends off each log first.
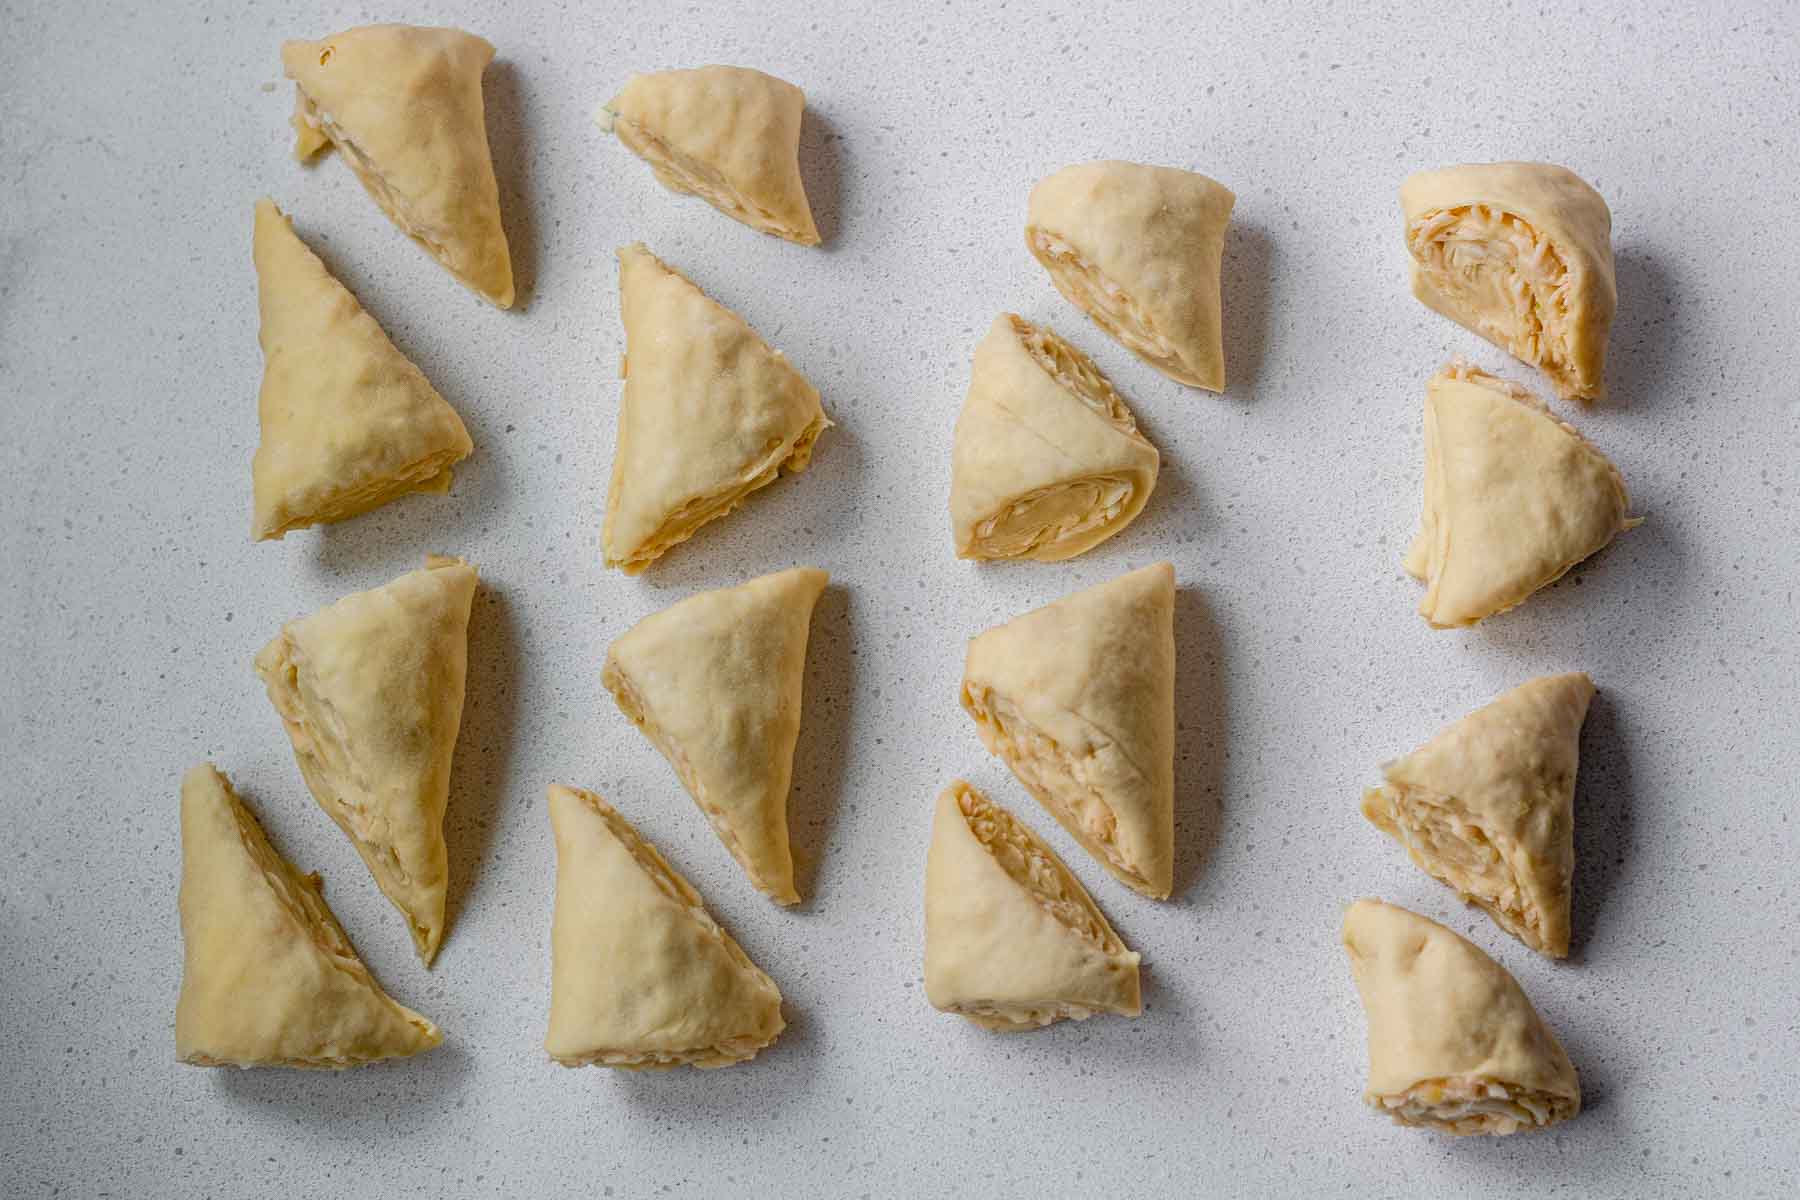
Cut the remaining sections into triangles, about 4 per log.

Here you can see the layers of butter, cheese, and dough.

Place the end pieces in the center of the prepared pan, cut-side down.
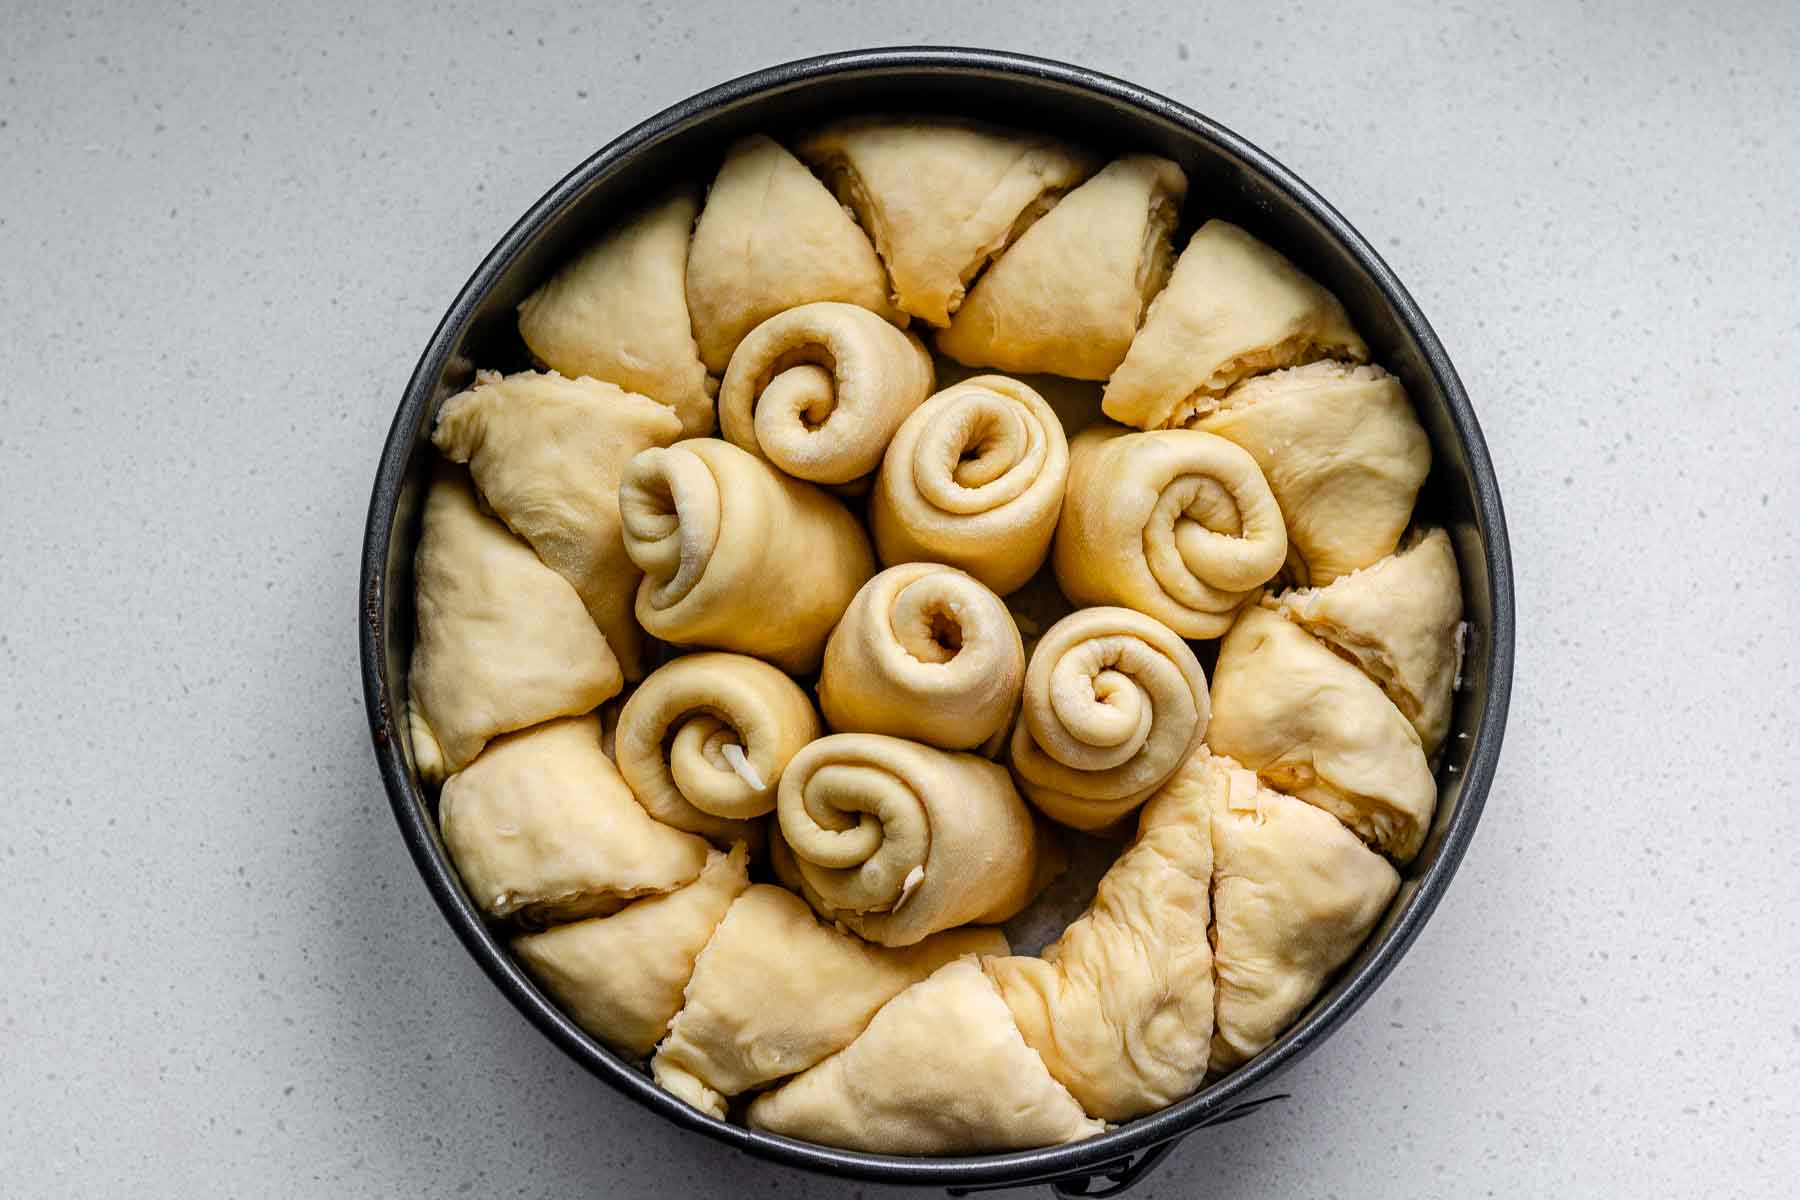
Arrange the rest of the pieces around the center pieces with the cut sides facing inward so they touch both the center dough and the pan edge. The pattern should look full but not tightly packed.
Second Rise
Cover the pan and let the shaped dough rise for about 45-60 minutes. The dough should look puffy and fill in most of the gaps.
Preheat and Egg Wash
Preheat the oven to 375°F.
Whisk the egg yolk with a splash of milk and gently brush it over the top of the dough.
Bake
Bake for 40 to 45 minutes until the bread is deep golden brown on top. The center should feel set and the bread should sound hollow when tapped lightly.
Finish with Butter
Let the bread cool in the pan for 15 minutes. Carefully release the springform pan. Make sure to do this, or your bread will collapse a bit!
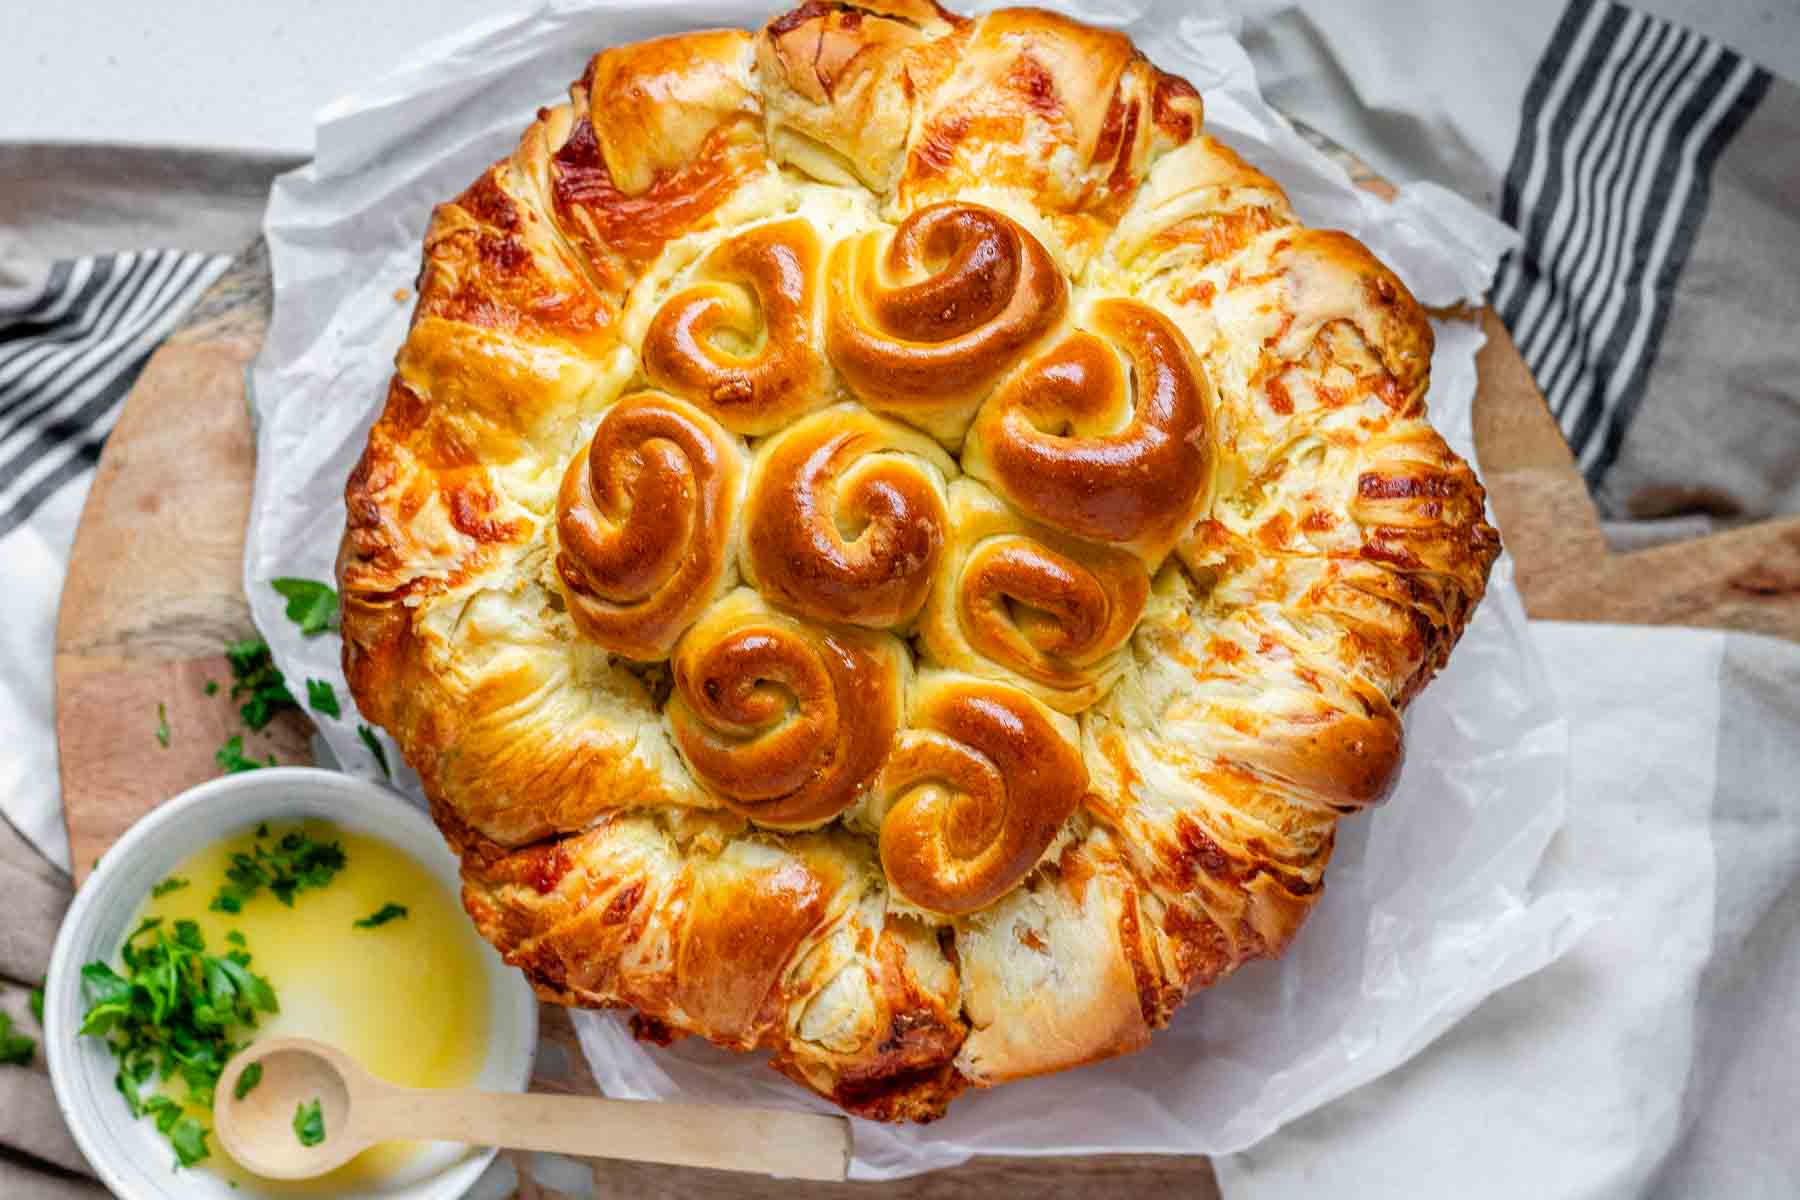
Reheat the remaining butter if needed and mix it with the chopped parsley. Brush the butter over the top and sides while the bread is still warm. Serve warm.
Storage
Let the bread cool completely before storing.
Store covered at room temperature. Because this bread is rich and buttery, it’s best eaten fresh but is still good for up to 3 or 4 days when wrapped.
What to Serve With Serbian-Inspired Butter Bread
This Serbian-inspired garlic butter bread pairs best with saucy mains, simple proteins, and cozy dinners where you want something to tear and dip. Try it with creamy tomato pasta sauce with chicken and spinach, or on the side of this simple cucumber and bell pepper salad.
FAQs
No, I am not Serbian. This recipe is inspired by Serbian pogaca but is not a traditional version. It’s a homemade variation with garlic and cheese added for extra flavour.
A deep 9-inch round cake pan will work, but lining it well with parchment is important. A springform pan makes removal much easier.
More Bread Recipes

If you’ve made this Serbian-Inspired Butter Bread recipe or another recipe on Pipercooks, I’d love it if you’d leave a comment with a recipe rating. I want to know how you enjoyed it, and ratings help other people know that the recipe is worth trying.
Serbian-Inspired Butter Bread with Gouda + Garlic
Equipment
Ingredients
Dough
- 3 teaspoons active dry yeast
- 1 cup warm milk 110-115°F
- 1 ½ tablespoons granulated sugar
- 600 grams all-purpose flour
- 1 teaspoon salt
- 3 large eggs at room temperature, see notes
- 2 tablespoons olive oil plus 1 teaspoon to brush the pan
Filling
- 113 grams butter melted (use remaining for topping)
- 100 grams mozzarella cheese
- 200 grams gouda cheese
- 5 cloves garlic minced
Topping
- 1 egg yolk
- splash of milk
- 1 teaspoon sesame seeds
- fresh parsley chopped
Instructions
- Warm the milk and add the active dry yeast and sugar. Whisk and let sit for 5 minutes or until frothy.
- Meanwhile, in the bowl of a stand mixer (or if mixing by hand, a large mixing bowl), whisk the flour and salt together.
- In a small bowl, whisk the eggs with the olive oil.
- Once the yeast has proofed, make a well in the center of the flour. Add the yeast mixture and the eggs.
- Set the mixer on low and mix until combined. It will take 2-3 minutes for all of the flour to be incorporated. If mixing by hand, this should take about the same amount of time.
- Set the mixer to medium-low (4 on my Kitchen Aid Pro 5). Knead for 5 minutes. This will be a soft and sticky-ish dough. By hand, this will take about 8-10 minutes or so. The outside of the dough will be smooth-ish but very soft and slightly tacky. Use lightly oiled hands if needed.
- Cover the dough and let it rise in a warm place until doubled in size, about 45-60 minutes.
- Line the bottom of a springform pan with parchment paper. Brush the edges with oil.
- Deflate the dough and divide evenly into 8 pieces. Roll into balls and set aside for 10 minutes to rest, covered.
- Roll each ball into a 4 x 8 inch rectangle.
- Brush one rectangle with melted butter. Sprinkle with 1/4 of the garlic and 1/4 of the cheese, less a tablespoon or so. Place another rectangle of dough on top. Brush with butter and add the remaining tablespoon or so of cheese. Slowly and carefully roll into a cinnamon bun style log. Repeat for the rest of the ingredients. You should have 4 logs of dough.
- Each log will be cut into 6 even pieces. Cut the ends off first. Place the eight end pieces in the center of the lined baking pan, cut sides down.
- For the insides of the logs, cut them into triangles (about 4 per log). These will be lined around the outside of the tin. Place them in sideways, so that their cut sides are toughing the center pieces of dough and the edge of the pan. They should form an interesting pattern. Rearrange as needed once all of the pieces are in the tin. They should be mostly evenly spaced. Cover and let rise for about 45 minutes.
- Preheat the oven to 375°F.
- Mix the remaining egg yolk with a splash of milk. Brush the top of the dough with the yolk mixture.
- Bake for 40-45 minutes, or until very golden brown.
- Let the bread sit for 15 minutes and then carefully remove from the springform pan.
- Mix the parsley with the remaining butter, which can be reheated to melt it again. Brush the butter mixture over the top and sides of the bread. To serve it family style, plate it and bring it to the table, and let everyone pull pieces from it.
Video
Notes
Nutritional information is an estimate. Values vary based on products used. Read our full Nutrition Disclaimer.
SHARE THIS RECIPE
Rating, commenting, and sharing my recipes really helps. Thanks for taking the time! Mention @pipercooksblog on Instagram.